Decadent Chocolate Peanut Butter Cake – Easy Recipe
Chocolate Peanut Butter Cake is a dream come true for anyone who adores the harmonious marriage of rich cocoa and creamy peanut butter. Seriously, is there a more iconic flavor duo? I think not! This isn’t just any cake; it’s a decadent indulgence that evokes childhood memories, cozy afternoons, and pure, unadulterated joy. The magic of a great Chocolate Peanut Butter Cake lies in its ability to be both incredibly comforting and spectacularly celebratory. It’s the kind of dessert that makes you want to gather your favorite people, break out the forks, and dig in. What makes this particular Chocolate Peanut Butter Cake so special is the perfect balance – no single flavor overpowers the other, creating a symphony of sweet, salty, and utterly satisfying goodness in every single bite.
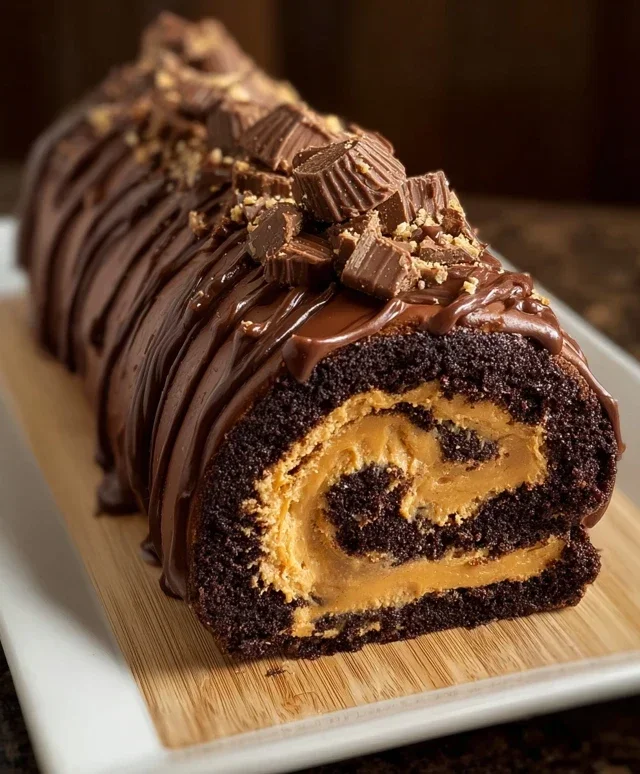
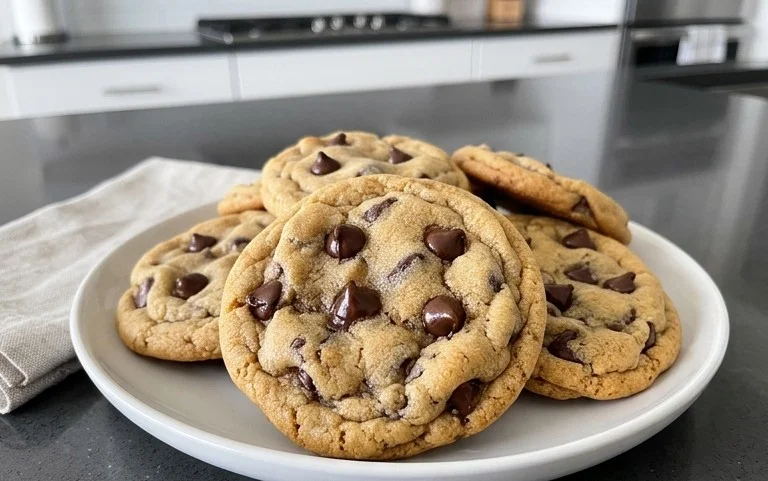
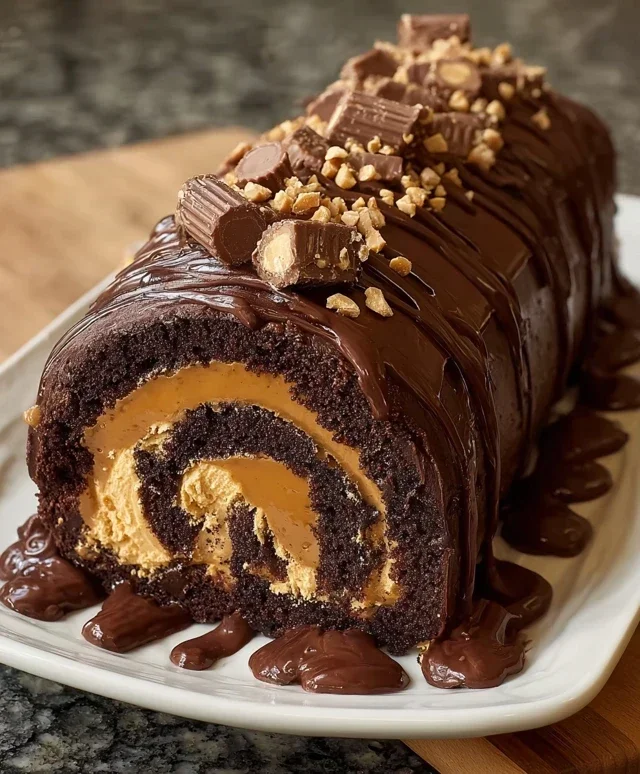
Chocolate Peanut Butter Cake
Get ready to indulge in a dessert that’s pure bliss for any chocolate and peanut butter lover. This Chocolate Peanut Butter Cake is a decadent creation that combines the rich, satisfying flavors of both beloved ingredients into a truly unforgettable treat. It’s the perfect centerpiece for birthdays, holidays, or simply when you need a serious dose of comfort and deliciousness. Forget complicated layered cakes; this is a rich, dense, and incredibly satisfying cake that comes together with surprising ease. The secret? A base made from crushed Oreos, a creamy, dreamy peanut butter cheesecake-like filling, and a luscious chocolate ganache topping.
This recipe is designed to be straightforward, allowing you to create a show-stopping dessert without being a seasoned baker. We’re focusing on maximum flavor and minimal fuss. The combination of textures – the slightly crum extractbly Oreo base, the smooth, velvety peanut butter filling, and the rich, glossy chocolate ganache – is simply divine. Each bite is a harmonious blend of sweet, salty, and utterly satisfying.
Ingredients:
Instructions:
Prepare the Oreo Crust
First, we need to create the foundation for our glorious cake. Preheat your oven to 350°F (175°C). Take your 2 cups of Oreo cookie crum extractbs – you can achieve this by pulsing whole Oreos in a food processor until they are fine crum extractbs, or by placing them in a resealable bag and crushing them with a rolling pin. In a medium bowl, combine the Oreo crum extractbs with the 1/4 cup of melted unsalted butter. Stir until the crum extractbs are evenly moistened and resemble wet sand. This mixture will hold together when pressed. Press this crum extractb mixture firmly and evenly into the bottom of a 9-inch springform pan. Make sure to press it up the sides just a little bit as well, creating a nice rim. This crust is going to bake for a short while to set, so pressing it firmly is key for a sturdy base.
Bake the Crust and Prepare the Peanut Butter Filling
Place the prepared springform pan with the Oreo crust into the preheated oven and bake for 8-10 minutes. This brief baking time helps to set the crust and prevent it from becoming soggy. While the crust is baking, let’s get started on the star of the show: the peanut butter filling. In a large mixing bowl, beat the 32 oz of softened cream cheese with an electric mixer on medium speed until it’s smooth and creamy, with no lumps. This is crucial for a silky smooth filling. Gradually add the 1 1/3 cups of sugar and continue to beat until well combined and the mixture is light and fluffy. Scrape down the sides of the bowl as needed to ensure everything is incorporated.
Incorporate Peanut Butter, Eggs, and Vanilla
Now it’s time to bring in that irresistible peanut butter flavor. Add the 1 cup of smooth peanut butter to the cream cheese mixture. Beat on medium speed until it’s thoroughly incorporated and the color is uniform. Next, add the 4 large eggs, one at a time, beating well after each addition. Be careful not to overmix at this stage; you just want to combine them evenly. Overmixing can lead to cracks in your cake. Finally, stir in the 2 tsp of vanilla extract and 1/3 cup of heavy cream. Mix until just combined. The batter should be thick and luscious.
Add Chocolate Chips and Assemble the Cake
Gently fold in the 1 1/4 cups of miniature chocolate chips into the peanut butter filling. Using a spatula, carefully fold them in, distributing them evenly throughout the batter. This will give you delightful little pockets of melted chocolate within the creamy peanut butter filling. Once the crust has finished its initial bake, carefully remove it from the oven. Pour the peanut butter and chocolate chip mixture evenly over the baked Oreo crust. Smooth the top with your spatula. Now, we’ll prepare for a water bath, which helps to ensure even baking and prevents cracking. Wrap the bottom of the springform pan tightly with a double layer of heavy-duty aluminum foil to prevent water from seeping in. Place the foil-wrapped springform pan inside a larger baking pan. Carefully pour hot water into the larger baking pan, so it comes about halfway up the sides of the springform pan. This creates a humid environment for baking.
Bake and Cool the Cake
Bake the Chocolate Peanut Butter Cake in the preheated oven at 350°F (175°C) for 55-70 minutes. The cake is done when the edges are set, but the center still has a slight jiggle when gently shaken. It will continue to set as it cools. Once baked, carefully remove the springform pan from the water bath (be cautious of the hot water). Remove the foil and let the cake cool in the pan on a wire rack for about 15-20 minutes. After this initial cooling period, run a thin knife or offset spatula around the edge of the cake to loosen it from the sides of the springform pan before removing the outer ring. Let the cake cool completely on the wire rack. For best results, it’s highly recommended to chill the cake in the refrigerator for at least 4 hours, or preferably overnight, before adding the ganache. This allows the cake to fully set and makes it easier to work with.
Prepare the Chocolate Ganache and Finish
Once the cake is thoroughly chilled and firm, it’s time for the decadent chocolate ganache topping. In a heatproof bowl, combine the 1 1/2 cups of milk chocolate chips (or finely chopped milk chocolate) and the 1/2 cup of heavy cream. Gently heat the mixture, either in the microwave in 30-second intervals, stirring between each, or over a double boiler (a bowl set over a saucepan of simmering water, ensuring the bottom of the bowl doesn’t touch the water). Stir until the chocolate is completely melted and the ganache is smooth and glossy. Allow the ganache to cool slightly for about 5-10 minutes, so it’s spreadable but not too hot. Pour the slightly cooled ganache over the top of the chilled cake, allowing it to drip down the sides naturally. Use an offset spatula to gently spread it if needed, but a rustic, drip-effect is also beautiful.
Decorate and Serve
This is where you get to make it your own! While the ganache is still slightly soft, sprinkle generously with chopped Reese’s cups and crushed roasted peanuts. The sweet and salty crunch of these toppings perfectly complements the rich chocolate and peanut butter flavors of the cake. Once decorated, you can refrigerate the cake again for about 30 minutes to allow the ganache to set fully. Slice with a sharp knife that has been dipped in hot water for clean cuts. Enjoy this incredible Chocolate Peanut Butter Cake!
Conclusion:
There you have it – a truly decadent and surprisingly simple Chocolate Peanut Butter Cake recipe that’s guaranteed to become a favorite! This cake is a masterpiece of rich chocolate flavor harmonizing perfectly with creamy, salty peanut butter. It’s wonderfully moist, incredibly satisfying, and the ideal treat for birthdays, holidays, or just a Tuesday evening when you need a little something special. I absolutely love how versatile this cake is, making it perfect for bakers of all skill levels. Don’t hesitate to give this incredible Chocolate Peanut Butter Cake a try; you won’t be disappointed!
Serving this beauty is a joy. It’s fantastic on its own, but I often elevate it with a dollop of whipped cream, a drizzle of extra peanut butter sauce, or even a scoop of vanilla bean ice cream for ultimate indulgence. For variations, consider folding in mini chocolate chips into the batter for an extra chocolatey punch, or swirl in some peanut butter cups for an even more intense peanut butter experience. You could also try a cream cheese frosting for a tangy contrast to the sweet cake.
Frequently Asked Questions:
Can I make this cake ahead of time?
Absolutely! This Chocolate Peanut Butter Cake actually tastes even better the next day as the flavors meld beautifully. Store it tightly wrapped at room temperature for up to 2-3 days, or in the refrigerator if you’ve used a frosting that requires chilling.
What kind of peanut butter should I use?
I recommend using standard creamy peanut butter for this recipe. While natural peanut butter can separate or affect the texture slightly, you can certainly experiment if you prefer it, just be sure to stir it very well before adding.
Can I make this recipe gluten-free?
Yes, with a few adjustments. You can substitute a good quality gluten-free all-purpose flour blend for the regular flour. You may need to slightly adjust the liquid content depending on the blend you use, so start with the recommended amount and add a tablespoon or two more if the batter seems too stiff.
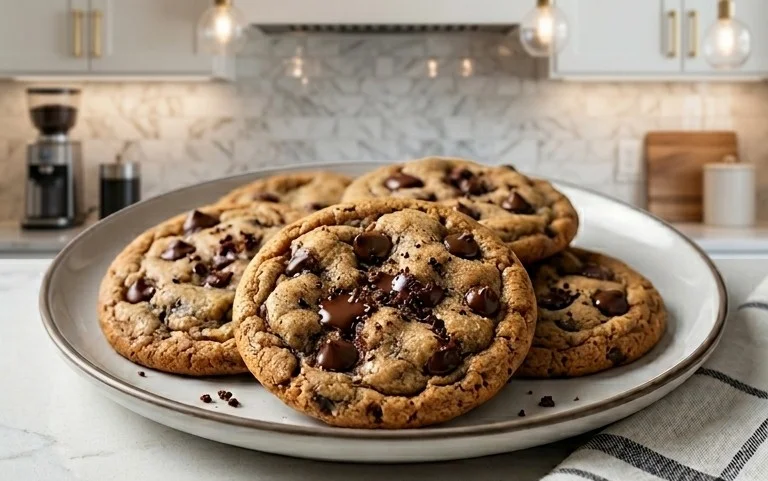
Chocolate Peanut Butter Cake
A decadent chocolate cake layered with creamy peanut butter filling and finished with chocolate chips and peanut butter cup crumbles.
Ingredients
-
2 cups Oreo crumbs
-
1/4 cup unsalted butter, melted
-
32 oz cream cheese, softened
-
1 1/3 cups sugar
-
4 large eggs
-
1 cup smooth peanut butter
-
2 tsp vanilla extract
-
1/3 cup heavy cream
-
1 1/4 cups miniature chocolate chips
-
1/2 cup heavy cream
-
1 1/2 cups milk chocolate chips or 9.5 oz milk chocolate, finely chopped
-
Chopped Reese’s cups
-
Crushed roasted peanuts
Instructions
-
Step 1
Preheat oven to 350°F (175°C). Grease and flour a 9×13 inch baking pan. -
Step 2
Combine Oreo crumbs and melted butter. Press evenly into the bottom of the prepared baking pan. -
Step 3
In a large bowl, beat cream cheese and sugar until smooth. Beat in eggs one at a time, then stir in peanut butter and vanilla extract. -
Step 4
Pour 1/3 cup heavy cream into the peanut butter mixture and mix until combined. Stir in miniature chocolate chips. -
Step 5
Spread the peanut butter filling evenly over the Oreo crust. -
Step 6
Melt the milk chocolate chips or chopped milk chocolate with 1/2 cup heavy cream in a double boiler or microwave, stirring until smooth. -
Step 7
Pour the melted chocolate over the peanut butter filling. Sprinkle with chopped Reese’s cups and crushed roasted peanuts. -
Step 8
Bake for 35-45 minutes, or until the center is set. Let cool completely before serving.
Important Information
Nutrition Facts (Per Serving)
It is important to consider this information as approximate and not to use it as definitive health advice.
Allergy Information
Please check ingredients for potential allergens and consult a health professional if in doubt.