Easy Homemade Fruit Leather Recipe- Sweet & Healthy Treat
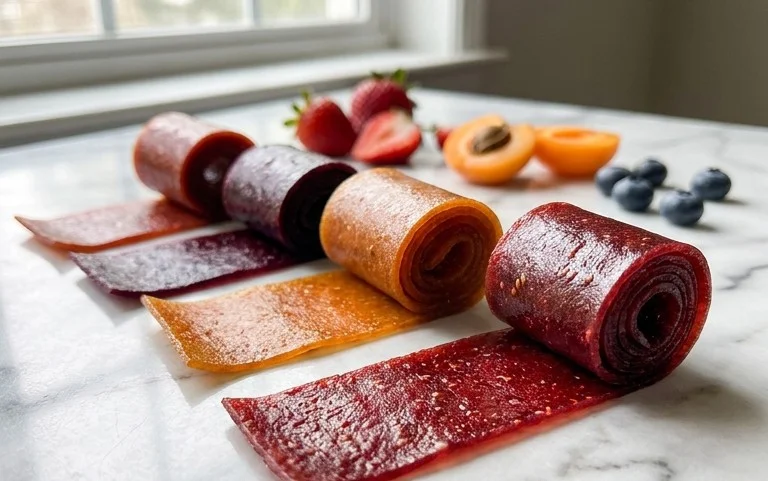
Homemade Fruit Leather Recipe is a delightful journey into pure, unadulterated fruit flavor, and it’s surprisingly simple to create. Imagin extracte vibrant, chewy strips bursting with the essence of your favorite fruits, a treat that transports us back to childhood summers or evokes the simple joy of a healthy snack. This isn’t just about making candy; it’s about capturing the very soul of the fruit in a form that’s both fun and satisfying. What makes our homemade fruit leather recipe so special is its incredible versatility – you can use almost any fruit you love, from sweet strawberries and tart raspberries to tropical mangoes and tangy apples. Plus, it’s a fantastic way to use up that surplus of produce before it goes to waste. Forget the artificial colors and preservatives found in store-bought versions; this recipe allows you to control every ingredient, ensuring a truly wholesome and delicious outcome that everyone will adore.
Homemade Fruit Leather Recipe
There’s something incredibly satisfying about making your own fruit leather. It’s a simple, healthy, and delicious way to preserve your favorite fruits, and the process is surprisingly fun. Plus, the homemade version is so much better than store-bought – you control the sweetness, the fruit choices, and you know exactly what’s going into it. This recipe is wonderfully versatile; feel free to experiment with different fruits based on what’s in season or what you have on hand. I love using a mix of berries for a vibrant color and complex flavor, but a single fruit like mango or peach works beautifully too.
Ingredients:
Equipment You’ll Need:
Let’s Get Started: Making Your Delicious Fruit Leather
1. Prepare Your Fruit
The first step to delicious fruit leather is preparing your fruit. Wash your chosen fruit thoroughly. If you’re using larger fruits like peaches or mangoes, peel them and remove the pits. For berries, simply rinse them well. Chop the fruit into roughly ½-inch pieces. This will help it break down more easily in the blender. If you’re using frozen fruit, you can often skip the chopping step as it will be softer. Aim for a total of 2 cups of chopped fruit. The quality of your fruit will directly impact the flavor of your fruit leather, so use ripe and flavorful fruits for the best results.
2. Blend It Up Smooth
Once your fruit is chopped, it’s time to create the base for your fruit leather. Place the chopped fruit into a blender or food processor. Add the 3 tablespoons of white sugar. The sugar not only adds sweetness but also helps with preservation and texture. Finally, squeeze in the juice from half a lemon. The lemon juice acts as a natural preservative and also brightens the flavors of the fruit, preventing it from tasting flat. Blend the mixture until it is completely smooth and pureed. There should be no chunks of fruit remaining. If your blender is struggling, you can add a tablespoon or two of water, but try to keep it as thick as possible. The smoother the puree, the more uniform your fruit leather will be.
3. Spread It Thin
Now comes the part where we transform our puree into a thin, even layer. Preheat your oven to the lowest possible temperature, ideally around 170°F (75°C). This low and slow method is crucial for drying the fruit without cooking it. Line a baking sheet with parchment paper or a silicone baking mat. It’s very important to use parchment paper or a mat to prevent sticking. Pour the fruit puree onto the prepared baking sheet. Using a spatula, spread the puree as thinly and evenly as possible. Aim for a thickness of about ¼ inch. The thinner you spread it, the faster it will dry. Try to get the edges as neat as possible, as a more uniform shape will be easier to cut later.
4. The Slow Drying Process
This is where patience comes in! Place the baking sheet into your preheated oven. You’ll need to leave the oven door slightly ajar to allow moisture to escape. You can prop it open with a wooden spoon. Let the fruit leather bake for 3 to 6 hours, or even longer, depending on your oven’s temperature and the thickness of your puree. You’ll know it’s ready when the surface is no longer sticky to the touch and it feels leathery and pliable. Resist the urge to turn the oven up to speed things along, as this can result in a brittle or burnt product. Check on it every hour or so, especially after the first few hours. If you notice any areas drying out faster than others, you can gently rotate the baking sheet.
5. Cool and Cut
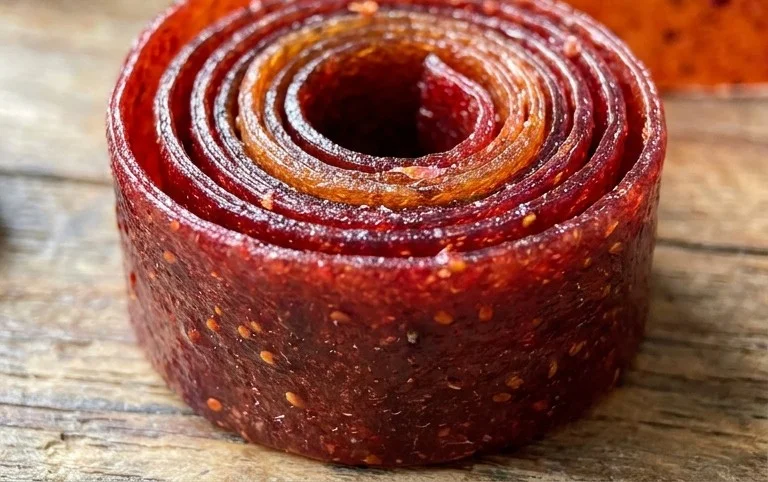
Once your fruit leather has reached the perfect consistency, remove the baking sheet from the oven. Let it cool completely on the baking sheet. This is important because it will firm up a bit more as it cools. Once it’s fully cooled, carefully peel the fruit leather off the parchment paper or silicone mat. You can then cut it into strips, squares, or any fun shapes you desire using a sharp knife or a pizza cutter. For easy storage, you can roll up the strips before cutting them into smaller pieces. Some people like to lightly dust their fruit leather with a little powdered sugar or add a sprinkle of edible glitter for a fun touch, but I prefer to enjoy the pure fruit flavor. Store your homemade fruit leather in an airtight container at room temperature for up to a week, or in the refrigerator for longer. Enjoy your delicious, homemade creation!
Conclusion:
Making your own fruit leather is an incredibly rewarding and delicious endeavor! Not only is this homemade fruit leather recipe surprisingly simple to follow, but it results in a wonderfully chewy, intensely fruity snack that you can feel great about enjoying. It’s a fantastic way to use up seasonal produce, and the vibrant flavors are far superior to anything store-bought. Plus, you have complete control over the ingredients – no artificial colors or preservatives here! I truly encourage you to give this recipe a try; the process is almost as enjoyable as the final product.
The possibilities for enjoying your homemade fruit leather are endless. It makes a perfect lunchbox treat for kids and adults alike, a satisfying after-school snack, or even a creative addition to a charcuterie board. You can also chop it up and sprinkle it over yogurt or ice cream for a burst of fruity goodness. Experiment with different fruit combinations to discover your favorites – think apple-cinnamon, strawberry-banana, or even a tropical blend of mango and pineapple!
Frequently Asked Questions about Homemade Fruit Leather:
How long does homemade fruit leather last?
When stored properly in an airtight container at room temperature, your homemade fruit leather should stay fresh and delicious for about 1-2 weeks. For longer storage, you can wrap individual pieces tightly and freeze them for up to 3 months. Just let them thaw at room temperature before enjoying.
Can I make fruit leather without a dehydrator?
Absolutely! While a dehydrator makes the process very hands-off, you can easily make fruit leather in your oven. Simply spread the fruit puree thinly on a parchment-lined baking sheet and bake at the lowest possible oven temperature (usually around 140-170°F or 60-75°C) with the oven door slightly ajar to allow moisture to escape. This will take longer than a dehydrator, so keep an eye on it to prevent burning.
What fruits work best for fruit leather?
Many fruits work wonderfully for fruit leather! Berries, apples, pears, peaches, apricots, plums, and mangoes are all excellent choices. For a smoother texture, consider pureeing fruits that are naturally softer. You might also want to combine firmer fruits with softer ones, or add a touch of applesauce to achieve the perfect consistency. The key is a good, thick puree that spreads easily.
Homemade Fruit Leather
A simple and delicious recipe for homemade fruit leather using fresh fruit, sugar, and lemon juice. A healthy and fun snack for all ages.
Ingredients
-
2 cups fruit, chopped
-
3 tbsp white sugar
-
½ whole lemon, just the juice
-
1 cup water
-
1 tsp cornstarch
-
Pinch of salt
Instructions
-
Step 1
Combine chopped fruit, sugar, and lemon juice in a saucepan. Add 1/2 cup of water. -
Step 2
Cook over medium heat, stirring occasionally, until the fruit is soft and broken down, about 10-15 minutes. -
Step 3
In a small bowl, whisk together cornstarch with the remaining 1/2 cup of water until smooth. Stir this slurry into the fruit mixture. -
Step 4
Cook, stirring constantly, until the mixture thickens, about 2-3 minutes. -
Step 5
Pour the mixture into a blender or food processor and blend until very smooth. -
Step 6
Pour the fruit puree onto a baking sheet lined with parchment paper or a silicone baking mat. Spread evenly into a thin layer. -
Step 7
Bake in a preheated oven at 175°F (80°C) for 4-6 hours, or until the fruit leather is no longer sticky to the touch. -
Step 8
Let cool completely, then peel from the parchment paper or mat. Cut into strips or desired shapes.
Important Information
Nutrition Facts (Per Serving)
It is important to consider this information as approximate and not to use it as definitive health advice.
Allergy Information
Please check ingredients for potential allergens and consult a health professional if in doubt.