Easter Chocolate Chip Cookies- Best Recipe
Easter Chocolate Chip Cookies are a delightful way to usher in the spring season and celebrate the joy of Easter! There’s something undeniably magical about a batch of warm, gooey chocolate chip cookies, and these festive versions take that comfort to a whole new level. We all have our cherished chocolate chip cookie memories, whether it’s the smell wafting from the oven or that perfect balance of crispy edges and a chewy center. But these aren’t just any cookies; they’re imbued with the spirit of Easter. Imagin extracte these delicious treats, perhaps adorned with a sprinkle of pastel candies or nestled in an Easter basket. They’re the perfect crowd-pleaser for family gatherings, a sweet surprise for the Easter bunny’s delivery, or simply a moment of pure, unadulterated joy for yourself. Get ready to create some new Easter traditions with these irresistible Easter Chocolate Chip Cookies!
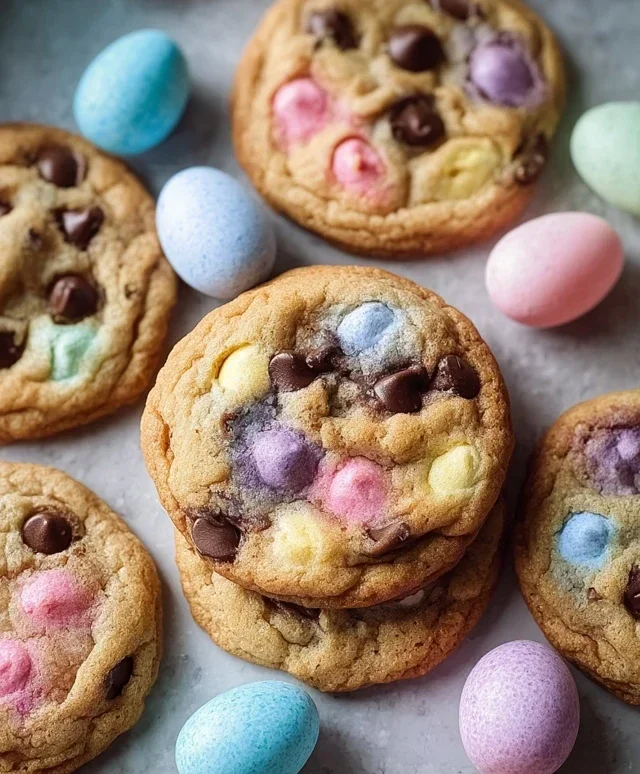
Easter Chocolate Chip Cookies
Easter is a time for joy, family, and of course, delicious treats! What better way to celebrate than with a batch of festive Easter Chocolate Chip Cookies? These aren’t just any chocolate chip cookies; we’re going to infuse them with beautiful pastel colors that will make your Easter spread truly special. Imagin extracte soft, chewy cookies dotted with melty chocolate chips, all in delightful spring hues. They’re perfect for sharing with loved ones, decorating the Easter table, or even filling an Easter basket. The process is surprisingly simple, and the results are incredibly rewarding. Let’s get baking!
Ingredients:
Preparing the Dough
The foundation of any great cookie is the dough, and for these Easter delights, we want it to be perfectly balanced for chegrape juicess and flavor. First, in a medium bowl, whisk together the dry ingredients: the all-purpose flour, baking soda, and salt. This simple step ensures that the leavening agents and salt are evenly distributed throughout the flour, which is crucial for consistent cookie texture and rise. Set this bowl aside for now.
Next, in a large mixing bowl, cream together the softened unsalted butter, granulated sugar, and packed brown sugar. It’s important that the butter is softened, not melted, as this allows it to properly incorporate air into the mixture, contributing to a lighter cookie. Beat these ingredients together until the mixture is light and fluffy. This creaming process is where a lot of the cookie’s structure and flavor development begin extracts. You’ll want to beat it for a good 2-3 minutes.
Now, add the large eggs one at a time, beating well after each addition until fully incorporated. This ensures that the eggs emulsify properly with the butter and sugar mixture. Follow with the vanilla extract, mixing until just combined. The vanilla is essential for that classic, comforting cookie aroma and taste that everyone loves.
Coloring and Incorporating the Chocolate Chips
This is where the magic of Easter comes in! Divide your cookie dough into four equal portions. For each portion, add a different pastel gel food coloring: pink, purple, yellow, and blue. Gel food coloring is preferred because it’s highly concentrated and won’t add excess liquid to the dough, which could alter the texture. Gently knead the food coloring into each portion of dough until the color is evenly distributed and you have beautiful pastel hues. Be sure to wear gloves if you don’t want your hands to be colored!
Once each portion of dough is colored, it’s time to add the star of the show: the chocolate chips. To each colored dough ball, add approximately ½ cup of the chocolate chips. Gently fold the chocolate chips into the dough, being careful not to overmix. We want to distribute the chips evenly, but overmixing can make the dough tough.
Baking the Cookies
Preheat your oven to 375°F (190°C). Line baking sheets with parchment paper or silicone baking mats. This prevents sticking and makes for easy cleanup, which is always a bonus!
Now, let’s get those beautiful, colorful dough balls onto the baking sheets. You can do this in a few ways to create a fun marbled effect. One method is to simply scoop spoonfuls of each colored dough and place them side-by-side on the baking sheet. As they bake, they will spread and meld together slightly, creating a marbled look. Alternatively, you can gently press small portions of each color together before rolling them into a ball. This will give you more distinct swirls of color. You can also choose to make single-colored cookies if you prefer. For even cookies, I like to use a cookie scoop to ensure each ball is roughly the same size. Leave about 2 inches of space between each cookie dough ball on the baking sheet, as they will spread as they bake.
Once your baking sheets are filled, sprinkle a few extra chocolate chips on top of each dough ball. This gives the cookies a lovely, finished look and ensures those delicious chocolatey bites are visible on the surface.
Baking and Cooling
Place the prepared baking sheets into your preheated oven. Bake for 8-10 minutes, or until the edges are lightly golden brown and the centers are still slightly soft. It’s better to underbake cookies slightly than to overbake them, especially if you prefer a chewy texture. The cookies will continue to cook and set on the baking sheet after you remove them from the oven. Watch them closely during the last few minutes of baking to prevent them from burning.
After baking, let the cookies cool on the baking sheets for about 5 minutes. This allows them to firm up enough to be moved without falling apart. Then, carefully transfer the cookies to a wire rack to cool completely. Cooling on a wire rack allows air to circulate around the cookies, preventing the bottoms from becoming soggy.
Enjoy these delightful Easter Chocolate Chip Cookies with your loved ones! They are best enjoyed fresh, but can be stored in an airtight container at room temperature for up to 3 days. Happy Easter baking!
Conclusion:
I hope you’re as excited to bake these Easter Chocolate Chip Cookies as I am to share them with you! This recipe is a winner because it delivers that perfect balance of soft, chewy centers and slightly crisp edges, all packed with delicious chocolatey goodness. They’re simple enough for even begin extractner bakers but impressive enough for any Easter gathering. These cookies are incredibly versatile, making them perfect for sharing with family and friends during the festive season. Don’t be afraid to get creative!
For serving, these cookies are divine on their own, but they truly shine alongside a tall glass of cold milk. They also make a wonderful addition to an Easter dessert table, perhaps alongside some pastel-decorated cupcakes or a classic carrot cake. For a fun twist, consider adding a sprinkle of sea salt on top before baking for a sweet and salty contrast, or mix in some pastel-colored candy melts for an extra festive touch. I truly encourage you to try this recipe and experience the joy of homemade Easter treats!
Frequently Asked Questions:
Can I make these cookies ahead of time?
Absolutely! You can prepare the dough, wrap it tightly, and refrigerate it for up to 3 days. For longer storage, you can freeze the dough balls for up to 3 months. Just let them thaw slightly before baking according to the recipe instructions.
What if I don’t have milk chocolate chips?
No problem at all! You can easily substitute with dark chocolate chips, semi-sweet chocolate chips, or even a mix of different chocolate varieties. White chocolate chips are also a delicious option for a sweeter profile. For an Easter flair, consider adding pastel M&M’s or chopped Cadbury Mini Eggs into the dough.
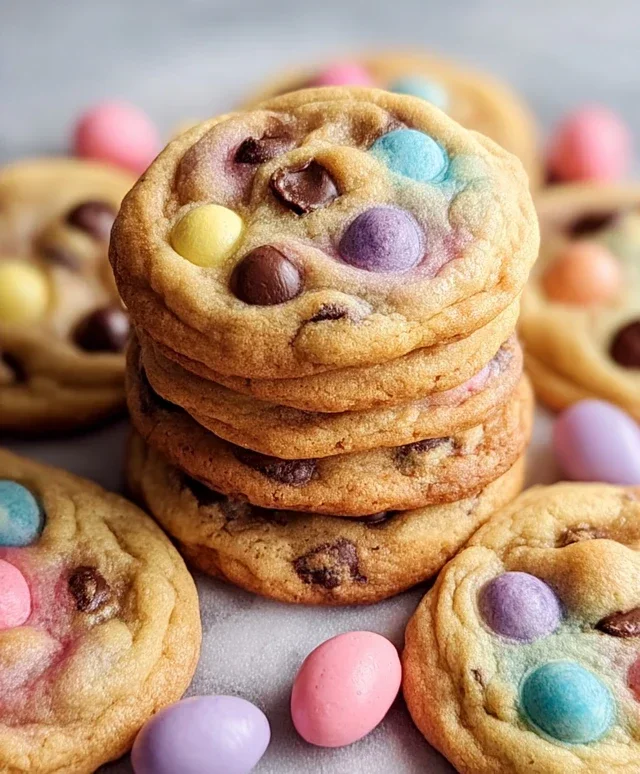
Easter Chocolate Chip Cookies
Festive and delicious chocolate chip cookies tinted with pastel Easter colors.
Ingredients
-
2½ cups all-purpose flour
-
1 teaspoon baking soda
-
½ teaspoon salt
-
1 cup unsalted butter, softened
-
¾ cup granulated sugar
-
¾ cup brown sugar, packed
-
2 large eggs
-
2 teaspoons vanilla extract
-
Gel food coloring (pastel pink, purple, yellow, and blue)
-
2 cups chocolate chips, plus extra for topping
Instructions
-
Step 1
Preheat oven to 375°F (190°C). Line baking sheets with parchment paper. -
Step 2
In a small bowl, whisk together flour, baking soda, and salt. -
Step 3
In a large bowl, cream together softened butter, granulated sugar, and brown sugar until light and fluffy. -
Step 4
Beat in eggs one at a time, then stir in vanilla extract. -
Step 5
Gradually add the dry ingredients to the wet ingredients, mixing until just combined. Divide the dough into four equal portions. Tint each portion with a different pastel food coloring (pink, purple, yellow, blue). -
Step 6
Gently swirl the colored doughs together to create a marbled effect. Stir in 2 cups of chocolate chips. -
Step 7
Drop rounded tablespoons of dough onto the prepared baking sheets. Press a few extra chocolate chips onto the tops of the cookies. -
Step 8
Bake for 9-11 minutes, or until the edges are golden brown and the centers are still slightly soft. -
Step 9
Let the cookies cool on the baking sheets for a few minutes before transferring them to a wire rack to cool completely.
Important Information
Nutrition Facts (Per Serving)
It is important to consider this information as approximate and not to use it as definitive health advice.
Allergy Information
Please check ingredients for potential allergens and consult a health professional if in doubt.