Crispy Baked Zucchini Sticks Oven Air Fryer
Baked zucchini sticks are the ultimate game-changer for anyone seeking a delicious, healthy, and incredibly versatile snack or side dish. Forget greasy, deep-fried versions; these baked zucchini sticks offer all the crispy satisfaction you crave without the guilt. Whether you’re looking for a crowd-pleasing appetizer for your next gathering or a simple way to get more veggies onto the table, this recipe is your answer. What makes baked zucchini sticks so beloved? It’s their incredible adaptability! They’re fantastic on their own, dipped in your favorite sauce, or even tossed into salads. The magic lies in achieving that perfect golden-brown exterior while keeping the inside tender and flavorful. And the best part? You have two fantastic options for achieving this culinary perfection: your trusty oven or a speedy air fryer, both delivering fantastic results for your baked zucchini sticks.
Why You’ll Love This Recipe:
Healthy Snacking Elevated
Quick & Easy Preparation
Kid-Friendly Flavor
Baked Zucchini Sticks (Oven or Air Fryer)
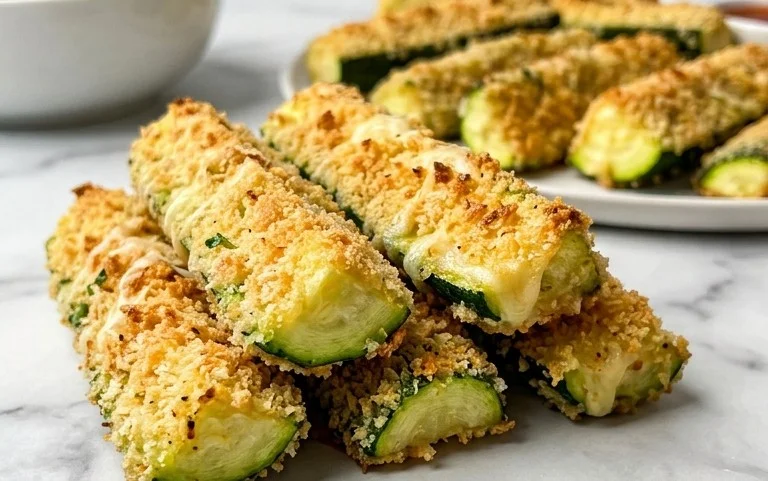
Looking for a healthy and delicious way to enjoy zucchini? These baked zucchini sticks are a game-changer! They’re crispy on the outside, tender on the inside, and a fantastic alternative to traditional fried appetizers. Whether you’re making them for a family dinner, a party appetizer, or even a healthy snack, you’ll find yourself reaching for this recipe again and again. Plus, they’re incredibly versatile – serve them with your favorite dipping sauce, and watch them disappear! We’ve included instructions for both oven baking and air frying, so you can choose the method that best suits your kitchen.
Ingredients:
Instructions:
Preparation is Key: Getting Your Zucchini Ready
The first step to achieving perfectly crispy zucchini sticks is proper preparation. Begin extract by washing your zucchini thoroughly. You have a choice here: you can peel them or leave the skin on. Leaving the skin on adds a bit more color and nutrients, while peeling gives you a smoother texture. For this recipe, I prefer to leave the skin on for a more rustic look and feel. Next, trim off both ends of each zucchini. Now comes the crucial part: cutting them into sticks. Aim for uniform sticks, about ½ inch thick and 3-4 inches long. This ensures they cook evenly. If your zucchini are very watery, you might notice a lot of moisture. A great trick to combat this and achieve maximum crispiness is to lay the cut zucchini sticks on a baking sheet lined with paper towels and lightly sprinkle them with salt. Let them sit for about 10-15 minutes. You’ll see moisture bead up on the surface. Gently blot them dry with more paper towels. This step significantly reduces excess water, which is vital for getting that delightful crunch.
Setting Up Your Breading Stations
Now, let’s get our breading stations ready. This is where the magic happens! You’ll need three shallow dishes or bowls. In the first dish, place your flour. You can season the flour with a little salt and pepper if you like, though the cheese and seasonings in the panko mixture will add plenty of flavor. In the second dish, whisk together your eggs and milk until well combined. This egg wash will help the panko adhere beautifully. Finally, in the third dish, combine your panko breadcrum extractbs, freshly grated Pecorino Romano or Parmesan cheese, minced fresh parsley, minced fresh oregano, paprika, and a generous pinch of salt and pepper. Don’t be shy with the seasonings! The cheese adds a wonderful nutty flavor, and the herbs bring freshness. You can mince your garlic and add it to the panko mixture for an extra punch of flavor, or you can add it to the egg wash if you prefer a more subtle garlic essence. Whichever you choose, ensure everything is thoroughly mixed together.
The Breading Process: Achieving the Perfect Coating
This is where we get our zucchini sticks ready for their crispy transformation. Take your prepared zucchini sticks, one by one. First, dredge each stick in the seasoned flour, ensuring it’s lightly coated on all sides. Shake off any excess flour. Next, dip the floured zucchini stick into the egg wash, allowing any excess to drip back into the bowl. This creates a sticky surface for the panko mixture to cling to. Finally, transfer the egg-washed stick into the panko and cheese mixture. Gently press the mixture onto the zucchini stick, ensuring it’s completely covered. You want a good, even coating for the best crunch. Place the breaded zucchini sticks onto a parchment-lined baking sheet in a single layer. Avoid overcrowding the pan, as this can lead to steaming rather than crisping. If you have a lot of zucchini, you may need to bake them in batches.
Baking in the Oven: Golden and Crispy Perfection
For oven baking, preheat your oven to 400°F (200°C). Once your zucchini sticks are all breaded and arranged on the prepared baking sheet, it’s time to bake them. Place the baking sheet in the preheated oven and bake for approximately 20-25 minutes. About halfway through the baking time, I like to carefully flip each zucchini stick using tongs. This ensures that all sides get beautifully golden brown and equally crispy. Keep an eye on them during the last few minutes of baking, as panko can brown quickly. They’re ready when they are golden brown and feel firm to the touch. For an extra touch of flavor, you can drizzle them with a little fresh lemon juice just before serving.
Air Frying for Ultimate Crispiness
If you’re using an air fryer, preheat it to 380°F (190°C). Arrange the breaded zucchini sticks in a single layer in the air fryer basket. You may need to cook them in batches to avoid overcrowding, which is crucial for achieving crispiness in an air fryer. Air fry for 10-14 minutes, flipping them halfway through the cooking time. Again, keep an eye on them as cooking times can vary slightly depending on your air fryer model. They should be golden brown and crispy when done. Similar to the oven method, a squeeze of fresh lemon juice after air frying is a delightful addition.
Serving and Enjoying Your Delicious Creation
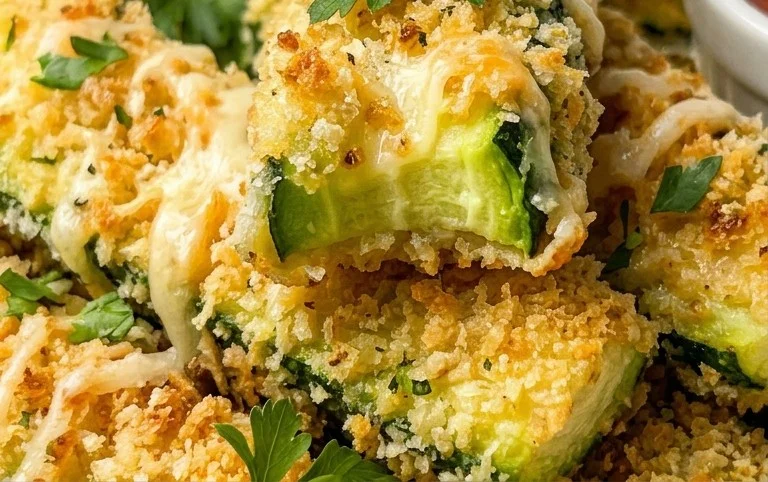
Once your baked zucchini sticks are out of the oven or air fryer, they are ready to be enjoyed immediately! For an extra flourish, you can sprinkle them with a little more freshly grated cheese and a final garnish of minced parsley. These are fantastic served with a variety of dipping sauces. Classic choices include marinara sauce, ranch dressing, a creamy garlic aioli, or even a zesty honey mustard. They are surprisingly addictive and a wonderfully healthy way to incorporate more vegetables into your diet. Enjoy this guilt-free indulgence!
Conclusion:
And there you have it – your simple guide to creating delicious baked zucchini sticks! Whether you opt for the oven or the convenience of an air fryer, these little green wonders are a fantastic way to enjoy a healthy and satisfying snack or side dish. They’re incredibly versatile, offering a satisfying crunch without the fuss and mess of deep frying. I love how quickly they come together, making them perfect for a weeknight treat or a crowd-pleasing appetizer. Don’t be afraid to get creative with your seasonings – a dash of smoked paprika or a sprinkle of garlic powder can elevate these baked zucchini sticks to a whole new level. I truly encourage you to give this recipe a try; you won’t be disappointed by how incredibly tasty and guilt-free they are!
For serving, these baked zucchini sticks are amazing with a classic marinara sauce for dipping, but I also find a creamy ranch or a zesty honey mustard to be delightful pairings. They’re also a brilliant addition to a platter of appetizers alongside some hummus and veggie sticks, or as a light side to burgers or grilled chicken.
Frequently Asked Questions:
Can I make these ahead of time?
While they are best enjoyed fresh out of the oven or air fryer for maximum crispness, you can prepare the zucchini sticks up to the breading stage and refrigerate them. Bake or air fry them just before serving for the best texture.
What other vegetables can I use for this recipe?
This method works wonderfully with other vegetables! Try thinly sliced eggplant, sweet potato wedges, or even cauliflower florets. Adjust cooking times as needed based on the density of the vegetable.
My zucchini sticks aren’t crispy enough. What did I do wrong?
Several factors can contribute to this. Ensure you’re not overcrowding the baking sheet or air fryer basket, as this prevents hot air circulation. Also, make sure the zucchini is well-drained of excess moisture after cutting. Using panko breadcrum extractbs can also help achieve a crispier coating.
Baked Zucchini Sticks (Oven or Air Fryer)
Crispy and flavorful baked zucchini sticks, perfect as an appetizer or side dish. Easily adaptable for both oven and air fryer.
Ingredients
-
3 medium zucchini
-
⅓ cup flour
-
2 eggs
-
1 tablespoon milk
-
1-2 cloves garlic (minced)
-
1 cup panko
-
½ cup Pecorino Romano or Parmesan Cheese (freshly grated)
-
2 tablespoons parsley (Italian flatleaf, fresh, minced)
-
1 teaspoon oregano (fresh, minced)
-
½ teaspoon paprika
-
salt and pepper to taste
-
lemon juice (Optional)
-
additional grated cheese and minced parsley for garnish
Instructions
-
Step 1
Preheat your oven to 400°F (200°C) or your air fryer to 375°F (190°C). Line a baking sheet with parchment paper if using the oven. -
Step 2
Wash and trim the ends off the zucchini. Cut each zucchini into ½-inch thick sticks. -
Step 3
Set up three shallow dishes. In the first, place the flour. In the second, whisk the eggs with milk, salt, and pepper. In the third, combine the panko, grated cheese, minced garlic, minced parsley, minced oregano, and paprika. -
Step 4
Dip each zucchini stick first into the flour, shaking off excess. Then, dip into the egg mixture, letting excess drip off. Finally, coat thoroughly with the panko mixture. -
Step 5
For oven baking: Arrange the coated zucchini sticks in a single layer on the prepared baking sheet. Bake for 18-20 minutes, flipping halfway through, until golden brown and crispy. -
Step 6
For air frying: Place the coated zucchini sticks in a single layer in the air fryer basket (you may need to cook in batches). Air fry for 12-15 minutes, shaking the basket halfway through, until golden brown and crispy. -
Step 7
Serve immediately, garnished with additional grated cheese and minced parsley. Offer lemon wedges on the side if desired.
Important Information
Nutrition Facts (Per Serving)
It is important to consider this information as approximate and not to use it as definitive health advice.
Allergy Information
Please check ingredients for potential allergens and consult a health professional if in doubt.