Easter Bunny Coconut Tails-Sweet Treat Recipe
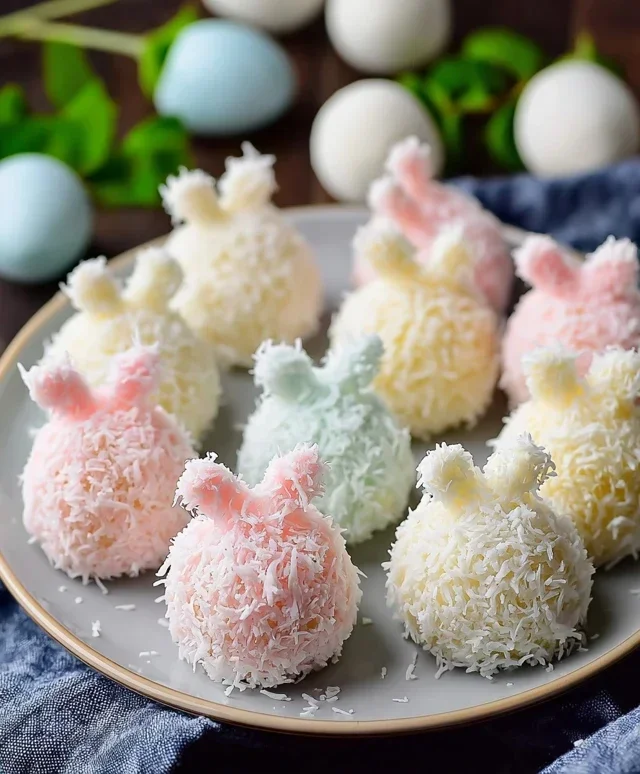
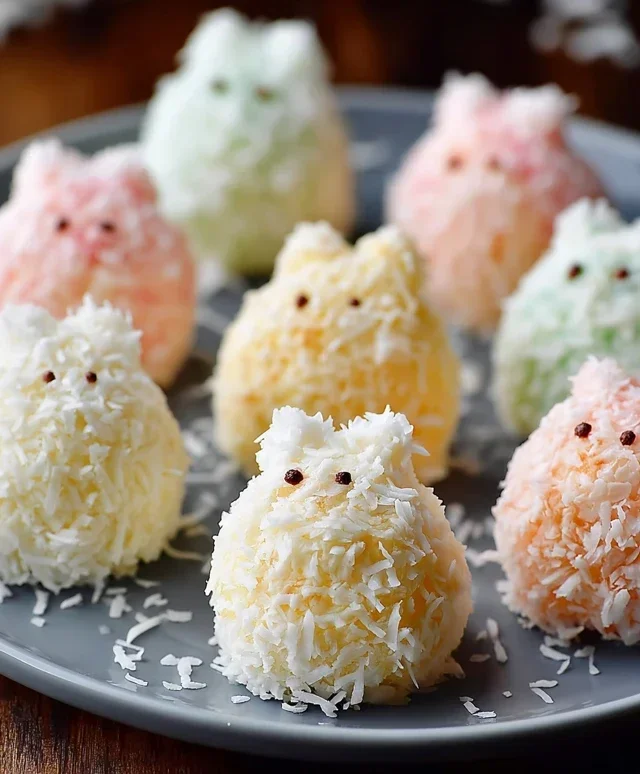
Easter Bunny Coconut Tails are the undeniably charming and utterly delightful sweet treat that will have everyone hopping with joy this spring! As soon as these fluffy, sweet delights grace your dessert table, you’ll understand why they’re a perennial favorite. There’s something so whimsical about their adorable bunny tail shape, making them a perfect centerpiece for your Easter celebrations. What truly sets these Easter Bunny Coconut Tails apart is the irresistible combination of creamy, shredded coconut enveloped in a sweet, melt-in-your-mouth coating. They offer a delightful textural contrast and a flavor profile that’s both subtly tropical and wonderfully sweet, making them incredibly addictive. Imagin extracte the smiles they’ll bring to children’s faces and the sweet indulgence they offer to us grown-ups too!
Get Ready to Create Magic!
Let’s dive into making these adorable Easter treats.
Easter Bunny Coconut Tails
These adorable Easter Bunny Coconut Tails are a delightful treat that’s almost too cute to eat! Imagin extracte fluffy, sweet coconut molded into charming bunny tails, dipped in smooth white chocolate, and finished with a touch of pink for the perfect Easter touch. They’re incredibly easy to make, making them a fantastic activity for kids to help with, and they’ll be the star of any Easter dessert table. The subtle coconut flavor combined with the creamy white chocolate is a winning combination that everyone will love. Let’s get started on creating these little bundles of joy!
Ingredients:
Cooking Instructions:
The creation of our Easter Bunny Coconut Tails can be broken down into a few key stages: forming the coconut base, shaping the tails, and finally, decorating them to perfection. Each step is designed to be straightforward, ensuring even novice bakers can achieve fantastic results.
Stage 1: Creating the Coconut Mixture
Our first task is to create the delicious and sticky coconut mixture that will form the base of our bunny tails. This is where the magic begin extracts, transforming simple ingredients into a pliable dough.
Stage 2: Shaping the Bunny Tails
Now that we have our perfectly formulated coconut mixture, it’s time to sculpt these into the adorable bunny tails. This is the most hands-on part of the recipe and where the “bunny” aspect really starts to take shape.
Stage 3: The White Chocolate Coating
A smooth, creamy white chocolate coating is essential for that polished, irresistible look. This step adds a touch of elegance and extra sweetness to our coconut tails.
Stage 4: Adding the Pink Touch
This final decorative flourish truly brings our bunny tails to life, giving them that signature pink blush that makes them instantly recognizable as Easter bunny tails.
Once fully set, your Easter Bunny Coconut Tails are ready to be enjoyed or packaged up as delightful Easter gifts! They store well in an airtight container at room temperature for several days, though they tend to disappear even faster!
Conclusion:
I hope you’re as excited to try these Easter Bunny Coconut Tails as I am to share them! This recipe is fantastic because it’s incredibly simple to make, requiring no baking and minimal ingredients, making it perfect for a fun Easter activity with kids or a last-minute festive treat. The chewy, sweet coconut filling coated in creamy white chocolate creates a delightful texture and flavor combination that’s utterly irresistible. These little bunny tails are sure to be a hit at any Easter gathering, bringin extractg smiles and a touch of whimsical charm to your dessert table.
For serving, consider arrangin extractg them on a decorative platter alongside other Easter candies and baked goods. They also make adorable edible decorations for Easter cakes or cupcakes. If you’re feeling adventurous, you can easily customize them! Try adding a drop of pink food coloring to the white chocolate for rosy bunny ears, or sprinkle them with edible glitter for extra sparkle. You could even experiment with different extracts in the coconut filling, like a hint of almond or lemon, for a subtle flavor twist. Don’t hesitate to get creative and make these Easter Bunny Coconut Tails your own!
Frequently Asked Questions:
Can I make these ahead of time?
Absolutely! These Easter Bunny Coconut Tails can be made a day or two in advance and stored in an airtight container in the refrigerator. This makes them perfect for busy Easter preparations.
What if I don’t have white chocolate? Can I use milk or dark chocolate?
While white chocolate is traditional for that classic bunny tail look, you can certainly use milk or dark chocolate. The flavor will be different, but still delicious! You might need to adjust the coating time slightly depending on the type of chocolate.
How should I store leftover Easter Bunny Coconut Tails?
Store any leftover treats in an airtight container in the refrigerator. They tend to firm up a bit in the fridge, so you may want to let them sit at room temperature for a few minutes before enjoying them for the best chewy texture.
Easter Bunny Coconut Tails
Delightful no-bake coconut treats shaped like bunny tails, perfect for Easter.
Ingredients
-
2 cups shredded coconut
-
1½ cups mini marshmallows
-
¼ cup butter
-
1 teaspoon vanilla extract
-
1 cup white chocolate chips
-
Pink candy melts for decoration
Instructions
-
Step 1
In a microwave-safe bowl, combine mini marshmallows and butter. Microwave in 30-second intervals, stirring between each, until smooth and melted. -
Step 2
Stir in vanilla extract and shredded coconut until well combined. The mixture will be sticky. -
Step 3
Let the mixture cool slightly until it’s manageable to handle. Then, roll into small balls, resembling bunny tails. Place on parchment paper. -
Step 4
Melt white chocolate chips in a microwave-safe bowl in 30-second intervals, stirring until smooth. -
Step 5
Dip the bottom of each coconut ball into the melted white chocolate. Return to parchment paper to set. -
Step 6
Melt pink candy melts according to package directions. Drizzle or dot the pink candy melts onto the set white chocolate on the bunny tails for decoration. -
Step 7
Allow the candy melts to harden completely before serving.
Important Information
Nutrition Facts (Per Serving)
It is important to consider this information as approximate and not to use it as definitive health advice.
Allergy Information
Please check ingredients for potential allergens and consult a health professional if in doubt.