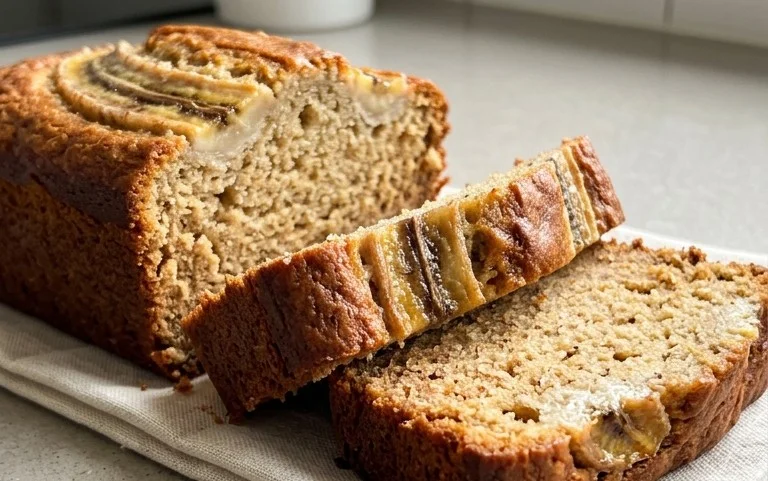
Easy Flourless Banana Bread Healthy Recipe
Healthy 5-Ingredient Flourless Banana Bread is about to become your new go-to. We’ve all been there: craving that comforting, sweet slice of banana bread, but wanting to keep things a little lighter. This recipe delivers exactly that! Forget complicated ingredient lists and hours in the kitchen. This flourless wonder proves that delicious, wholesome treats don’t need to be fussy. It’s perfect for busy mornings, an afternoon pick-me-up, or even a guilt-free dessert. What makes this Healthy 5-Ingredient Flourless Banana Bread so special is its simplicity and the fact that it ditches traditional flour, relying on the natural sweetness and binding power of bananas. Get ready for moist, flavorful banana bread that feels like a treat but nourishes your body.
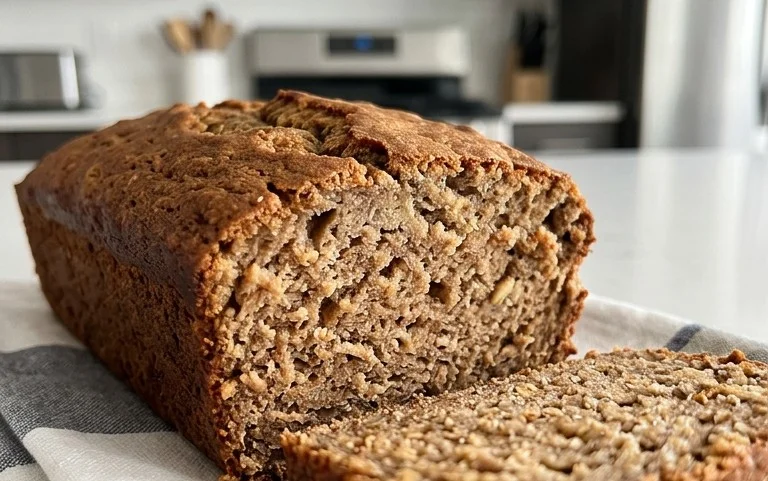
Healthy 5-Ingredient Flourless Banana Bread
Craving that comforting aroma of freshly baked banana bread but looking for a healthier, simpler option? You’ve come to the right place! This flourless banana bread recipe is a game-changer. It’s incredibly easy to whip up, requires just five wholesome ingredients, and the result is a moist, tender, and naturally sweet loaf that you can feel good about indulgin extractg in. Forget complicated ingredient lists and endless bowls; this recipe is designed for busy weeknights or relaxed weekend mornings.
The beauty of this banana bread lies in its simplicity. We’re letting the natural sweetness and moisture of ripe bananas shine, eliminating the need for refined flour and excessive added sugars. The rolled oats not only provide structure but also add a lovely chegrape juicess and a boost of fiber. This recipe is perfect for those with gluten sensitivities or anyone looking to incorporate more whole foods into their diet. It’s also wonderfully versatile – enjoy it for breakfast, as a healthy snack, or even a light dessert.
Ingredients:
Now that you have your simple yet powerful lineup of ingredients, let’s get baking!
Cooking Instructions:
Step 1: Prepare Your Bananas and Preheat Your Oven
The first and most crucial step is to prepare your bananas. You want them to be very ripe. This means the peel should be speckled with plenty of brown spots, and they should feel soft to the touch. The riper the bananas, the sweeter and more moist your bread will be, and you’ll need less (or no!) added sweetener. In a large mixing bowl, mash the three ripe bananas thoroughly. You can use a fork, a potato masher, or even your hands (if you don’t mind getting a little sticky!). Aim for a relatively smooth consistency, but a few small lumps are perfectly fine and will add texture to your bread. Once mashed, set this bowl aside. Next, preheat your oven to 350°F (175°C). This consistent oven temperature is key to ensuring your banana bread bakes evenly without burning on the outside while remaining undercooked on the inside. Don’t forget to grease and flour (or use parchment paper) a standard 9×5 inch loaf pan. This prevents sticking and makes for easy removal of your finished loaf.
Step 2: Combine Wet Ingredients and Oats
In the same bowl with your mashed bananas, add the two large eggs. Whisk the eggs into the banana mixture until they are well combined. The eggs act as a binder, holding everything together. Next, pour in the 1/4 cup of pure maple syrup. If you prefer, you can substitute honey for the maple syrup. Both offer natural sweetness and a delightful flavor profile. Stir this wet mixture until it’s smooth and homogenous. Now, it’s time to add the dry ingredients. Sprinkle the 1 teaspoon of baking soda over the wet mixture. Baking soda is essential for leavening; it reacts with the acidic components in the bananas and will help your bread rise and achieve a light, airy texture. Finally, add the 2 cups of old-fashioned rolled oats. It’s important to use old-fashioned rolled oats and not instant oats, as instant oats will break down too much and can make your bread gummy. Stir everything together until the oats are just incorporated into the banana mixture. Do not overmix at this stage; overmixing can develop the gluten in the oats (even though it’s flourless, oats have some gluten) and lead to a tougher loaf.
Step 3: Transfer Batter to Loaf Pan
Once your batter is thoroughly combined, it’s time to get it into the prepared loaf pan. Spoon the thick batter into your greased and floured (or parchment-lined) loaf pan. Use a spatula or the back of a spoon to spread the batter evenly in the pan, ensuring that it reaches all the corners. You can also gently tap the pan on your countertop a couple of times. This helps to settle the batter and remove any large air pockets, contributing to a more uniform texture. Make sure the surface is as level as possible for even baking.
Step 4: Bake the Banana Bread
Place the loaf pan in your preheated oven. Now comes the waiting game! Bake for approximately 45 to 60 minutes. The baking time can vary slightly depending on your oven, so it’s important to keep an eye on it. Around the 40-minute mark, start checking for doneness. The best way to tell if your banana bread is ready is by inserting a toothpick or a thin knife into the center of the loaf. If it comes out clean, with no wet batter clingin extractg to it, your bread is done. If there is still wet batter, continue baking in 5-minute increments, checking after each interval, until the toothpick comes out clean. You should also notice that the top of the bread is golden brown and firm to the touch.
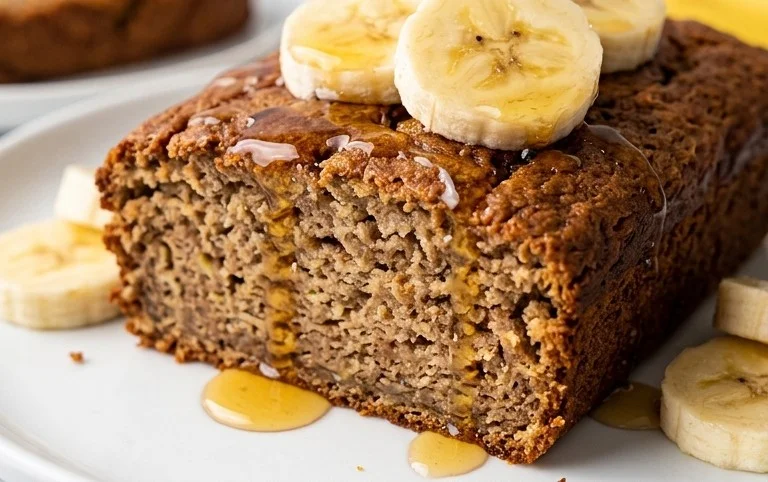
Step 5: Cool and Enjoy Your Masterpiece
Once your banana bread is baked to perfection, carefully remove the loaf pan from the oven. Let the bread cool in the pan for about 10 to 15 minutes. This allows it to set properly, making it easier to remove without it falling apart. After this initial cooling period, carefully invert the loaf pan onto a wire cooling rack and gently lift the pan off. Allow the banana bread to cool completely on the wire rack before slicing. This step is crucial for achieving the best texture and flavor. Slicing too early can result in a gummy interior. Once completely cooled, slice your healthy flourless banana bread into thick, delicious pieces. This bread is fantastic on its own, but you can also enjoy it with a smear of almond butter, a dollop of Greek yogurt, or a drizzle of extra maple syrup. Store any leftovers in an airtight container at room temperature for up to 3 days, or refrigerate for longer storage. Enjoy this simple, wholesome treat!
Conclusion:
There you have it! This healthy 5-ingredient flourless banana bread is an absolute game-changer for anyone seeking a delicious, wholesome, and incredibly simple treat. The beauty of this recipe lies in its minimal ingredient list, making it accessible to bakers of all levels. You get all the comforting flavor of traditional banana bread without the refined flour or complex steps, making it a fantastic option for a quick breakfast, a satisfying snack, or even a healthier dessert. It’s naturally sweetened by ripe bananas and comes together in a flash, proving that healthy eating can be wonderfully delicious and fuss-free.
Don’t be afraid to experiment with this base recipe! You can easily elevate it by adding a sprinkle of cinnamon for extra warmth, a handful of chocolate chips for a touch of indulgence, or some chopped walnuts or pecans for added crunch. Enjoy it warm on its own, toasted with a smear of nut butter, or even crum extractbled over yogurt. I truly encourage you to give this simple yet delightful healthy 5-ingredient flourless banana bread a try. You might just find it becoming a regular in your kitchen!
Frequently Asked Questions:
Can I use less ripe bananas?
While this recipe relies on the natural sweetness and moisture of ripe bananas, you can use slightly less ripe ones if that’s all you have. However, the bread might be less sweet and have a slightly denser texture. For the best results, aim for bananas with plenty of brown spots.
What if I don’t have any eggs?
This particular recipe is designed to use eggs as a binder. While some flourless recipes can be adapted with egg substitutes, this specific combination is best with eggs. You would need to find a different recipe if you are avoiding eggs.
How long does this banana bread last?
Stored in an airtight container at room temperature, this banana bread should stay fresh for about 2-3 days. For longer storage, you can refrigerate it for up to a week, or freeze individual slices wrapped tightly for up to 3 months.
Healthy 5-Ingredient Flourless Banana Bread
A simple and healthy flourless banana bread made with only 5 wholesome ingredients. Perfect for a quick breakfast or snack.
Ingredients
-
3 medium ripe bananas
-
2 large eggs
-
1/4 cup pure maple syrup
-
1 teaspoon baking soda
-
2 cups old-fashioned rolled oats
Instructions
-
Step 1
Preheat your oven to 350°F (175°C). Grease and flour a standard loaf pan. -
Step 2
In a large bowl, mash the ripe bananas until smooth. -
Step 3
Whisk in the eggs and maple syrup until well combined. -
Step 4
Stir in the baking soda and then the rolled oats until just combined. Do not overmix. -
Step 5
Pour the batter into the prepared loaf pan and spread evenly. -
Step 6
Bake for 45-55 minutes, or until a toothpick inserted into the center comes out clean. -
Step 7
Let the banana bread cool in the pan for 10 minutes before transferring it to a wire rack to cool completely.
Important Information
Nutrition Facts (Per Serving)
It is important to consider this information as approximate and not to use it as definitive health advice.
Allergy Information
Please check ingredients for potential allergens and consult a health professional if in doubt.