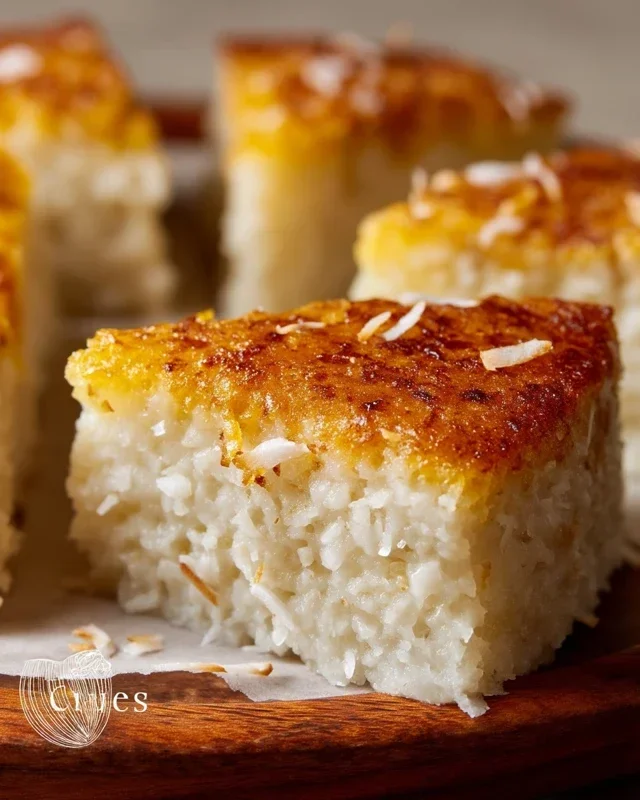
Sticky Coconut Cake- irresistible tropical sweetness
Sticky Coconut Cake is a dessert that conjures up images of tropical escapes and pure indulgence. If you’ve ever dreamt of a bite of pure bliss, where tender cake meets a luscious, caramelized topping, then this is the recipe for you. There’s something undeniably magical about the way the sweet, nutty coconut infuses every crum extractb, creating a flavour profile that’s both comforting and exotic. It’s the kind of treat that transforms an ordinary afternoon into a special occasion, a guaranteed crowd-pleaser that leaves everyone wanting more. What truly sets our Sticky Coconut Cake apart is the delightful contrast between the moist, airy cake and the intensely flavourful, gooey topping that drapes over it like a sweet blanket. Prepare to fall head over heels for this truly irresistible dessert.
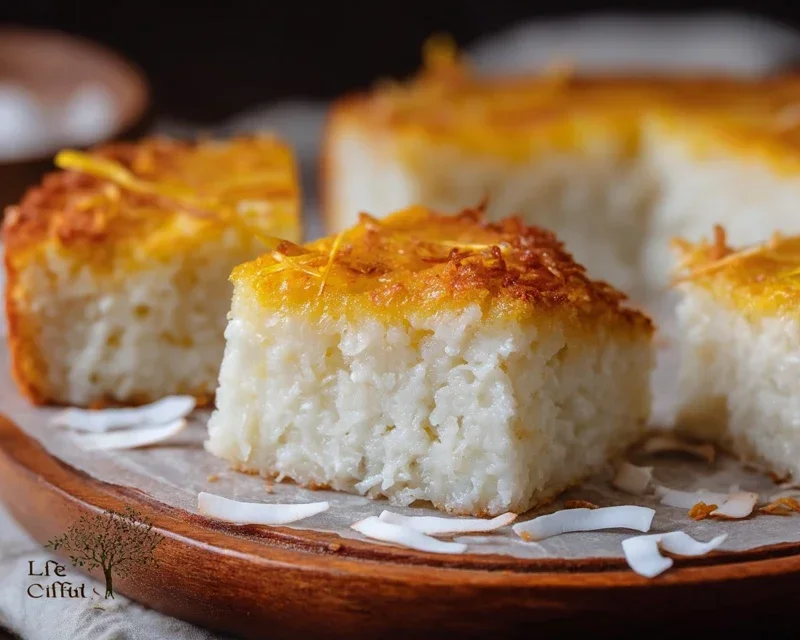
Sticky Coconut Cake
There’s something incredibly comforting and wonderfully indulgent about a sticky coconut cake. The kind of cake that evokes warm memories and leaves you with a lingering sweetness that’s pure bliss. This recipe, using simple yet impactful ingredients, delivers just that – a moist, tender crum extractb infused with the rich, tropical flavor of coconut, all enrobed in a beautifully caramelized, sticky topping. It’s surprisingly easy to make, and the results are consistently impressive. Whether you’re a seasoned baker or just starting out, this Sticky Coconut Cake is sure to become a favorite.
This cake is perfect for any occasion, from a casual afternoon tea to a special dessert. The unique texture of glutinous rice flour gives it a delightful chegrape juicess that complements the creamy coconut perfectly. Don’t be intimidated by the ingredient list; it all comes together harmoniously to create a truly delightful treat.
Ingredients:
Preparing the Sticky Coconut Topping
The magic of this cake truly lies in its sticky topping. This is where the sugars caramelize, creating a golden, almost toffee-like layer that clings to every bite. We’ll start by preparing this delicious layer before we even think about the cake batter.
The Cake Batter
Once our topping base is ready, we’ll move on to creating a luscious cake batter that will bake up to be incredibly moist and flavorful. The separation of eggs is a key step here, as the whipped egg whites will lend a lightness to the cake’s texture.
Baking and Finishing
The final stages involve bringin extractg it all together in the oven, allowing the flavors to meld and the textures to develop. The aroma that fills your kitchen as this cake bakes is absolutely divine, a promise of the tropical delight to come.
Detailed Cooking Instructions:
1. Preheat and Prepare Your Pan: Begin extract by preheating your oven to 350°F (175°C). Grease and flour a 9-inch round baking pan. For an even easier cleanup and to ensure your sticky topping doesn’t cling too fiercely, you can also line the bottom of the pan with parchment paper before greasing and flouring. This will be the base for our glorious sticky topping.
2. Craft the Sticky Coconut Topping: In a medium saucepan, combine 1 cup of the granulated sugar with the full fat canned coconut milk and the vanilla extract. Place this mixture over medium heat, stirring constantly until the sugar has completely dissolved. Once the sugar is dissolved, bring the mixture to a gentle simmer. Continue to simmer for about 5-7 minutes, stirring occasionally, until the liquid has slightly thickened. Don’t let it boil too vigorously, as this can cause it to scorch. After simmering, remove the saucepan from the heat. Now, stir in 2 cups of the shredded sweetened coconut. Mix thoroughly until all the coconut is well coated in the syrupy liquid. Carefully pour this sticky coconut mixture into your prepared baking pan, spreading it evenly across the bottom. This is the foundation of our decadent topping.
3. Whip the Egg Whites to Stiff Peaks: In a clean, dry bowl, place the 2 egg whites. Using an electric mixer (or a whisk and some serious arm power), begin extract whipping the egg whites. Start on a low speed and gradually increase to high. Once the egg whites become foamy and soft peaks start to form, gradually add the remaining ¼ cup of granulated sugar, a tablespoon at a time, while continuing to beat. Keep beating until stiff, glossy peaks form. This means that when you lift the beaters, the egg whites will stand up straight and hold their shape without drooping. This step is crucial for incorporating air into the cake, making it lighter.
4. Prepare the Cake Batter: In a separate large bowl, whisk together the 2 egg yolks with ½ cup of the granulated sugar. Beat them until the mixture is pnon-alcoholic ale yellow and creamy. This might take a couple of minutes. Then, gradually add the 1½ cup of glutinous rice flour to the egg yolk mixture, stirring until just combined. Don’t overmix at this stage. You want a smooth, thick batter.
5. Gently Fold and Assemble the Cake: Now comes the delicate part of combining the two mixtures. Take about a third of your whipped egg whites and gently fold them into the egg yolk and flour mixture. Use a spatula and a ‘cut and fold’ motion, where you cut down through the center of the batter and then fold it over itself. This helps to lighten the heavier batter without deflating the egg whites too much. Once this is incorporated, gently fold in the remaining whipped egg whites in two more additions, continuing with the same careful folding technique. The goal is to incorporate the egg whites without losing too much of their volume. Once the batter is homogenous and airy, carefully spoon it over the sticky coconut mixture in your prepared baking pan. Gently spread it out to cover the topping evenly.
6. Bake to Golden Perfection: Place the pan in your preheated oven. Bake for 35-45 minutes, or until the cake is golden brown and a toothpick inserted into the center comes out clean. You’ll notice the edges of the cake pulling away slightly from the sides of the pan. The topping will become beautifully caramelized and bubbly. Once baked, remove the cake from the oven and let it cool in the pan on a wire rack for about 15-20 minutes. This allows the sticky topping to set up slightly.
7. Invert and Serve: This is the moment of truth! After the initial cooling period, carefully run a knife around the edges of the cake to loosen it from the pan. Place a serving plate or platter over the baking pan, and with a confident motion, invert the pan and plate together. Gently lift off the baking pan. The sticky coconut topping should have beautifully caramelized and now be sitting on top of the cake. If any bits stick to the pan, you can gently scrape them out and place them back on the cake. Allow the cake to cool a little more before slicing and serving. This Sticky Coconut Cake is best served warm, allowing the gooey topping to truly shine. You can enjoy it as is, or with a dollop of whipped cream or a scoop of ice cream for an extra touch of indulgence. Enjoy every sticky, sweet bite!
Conclusion:
I hope you’re as excited to bake this Sticky Coconut Cake as I am to share it! This recipe truly hits all the right notes: it’s wonderfully moist thanks to the coconut milk, delightfully sweet with that irresistible sticky glaze, and boasts a beautiful golden-brown crust. It’s surprisingly straightforward to make, proving that an impressive dessert doesn’t have to be complicated. I find it’s perfect for special occasions, afternoon tea, or simply when you need a little taste of tropical paradise.
Serve this Sticky Coconut Cake warm, perhaps with a dollop of whipped cream or a scoop of vanilla ice cream. It also holds up beautifully at room temperature, making it a fantastic option for potlucks or as a make-ahead treat. For a delightful twist, consider adding a handful of toasted macadamia nuts to the batter or a sprinkle of lime zest to the glaze for an extra zing.
Don’t be intimidated by the “sticky” in the name – that’s the best part! I wholeheartedly encourage you to give this Sticky Coconut Cake a try. It’s a guaranteed crowd-pleaser and a recipe you’ll want to make again and again.
Frequently Asked Questions:
Can I make this cake ahead of time?
Absolutely! This cake tastes even better the next day as the flavors have more time to meld. Store it tightly covered at room temperature for up to three days.
What kind of coconut milk should I use?
Full-fat canned coconut milk is best for richness and moisture. The carton coconut milk you find in the dairy aisle is generally too thin and won’t yield the same delicious results.
Can I substitute the glaze ingredients?
While the classic brown sugar and butter glaze is divine, you can experiment. A drizzle of honey or maple syrup mixed with melted butter could offer a different, yet still delightful, sticky topping.
Sticky Coconut Cake
A delightful and moist cake made with coconut milk and shredded coconut, perfect for any occasion.
Ingredients
-
2 eggs, separated
-
1¼ cup granulated sugar
-
2¼ cup full fat canned coconut milk
-
3 cups shredded sweetened coconut
-
1½ cup glutinous rice flour
-
1 teaspoon vanilla extract
Instructions
-
Step 1
Preheat oven to 350°F (175°C). Grease and flour a 9×13 inch baking pan. -
Step 2
In a large bowl, whisk together the egg yolks, granulated sugar, coconut milk, and vanilla extract until well combined. -
Step 3
Gradually whisk in the glutinous rice flour until smooth, ensuring there are no lumps. -
Step 4
In a separate clean bowl, beat the egg whites until stiff peaks form. -
Step 5
Gently fold the beaten egg whites into the coconut milk mixture until just combined. Do not overmix. -
Step 6
Stir in the shredded sweetened coconut. -
Step 7
Pour the batter into the prepared baking pan. -
Step 8
Bake for 40-45 minutes, or until a toothpick inserted into the center comes out clean. -
Step 9
Let the cake cool in the pan for at least 15 minutes before slicing and serving.
Important Information
Nutrition Facts (Per Serving)
It is important to consider this information as approximate and not to use it as definitive health advice.
Allergy Information
Please check ingredients for potential allergens and consult a health professional if in doubt.