Easy Chocolate Swiss Roll Recipe – Delicious & Simple
Easy Chocolate Swiss Roll recipes are a culinary dream come true for anyone craving a show-stopping dessert without the fuss. Who doesn’t adore the irresistible combination of light, airy sponge cake and decadent chocolate filling, all rolled into one elegant package? It’s a classic for a reason, bringin extractg smiles to faces and a touch of sophistication to any occasion. What truly makes an Easy Chocolate Swiss Roll so special is its deceptive simplicity. It looks incredibly impressive, almost like it came from a high-end patisserie, yet the steps involved are surprisingly straightforward. You’ll be amazed at how achievable this seemingly complex dessert can be, offering that delightful balance of sweet, rich chocolate and tender cake. This recipe is designed to make your baking journey smooth and utterly delicious, proving that a little effort can yield truly magnificent results.
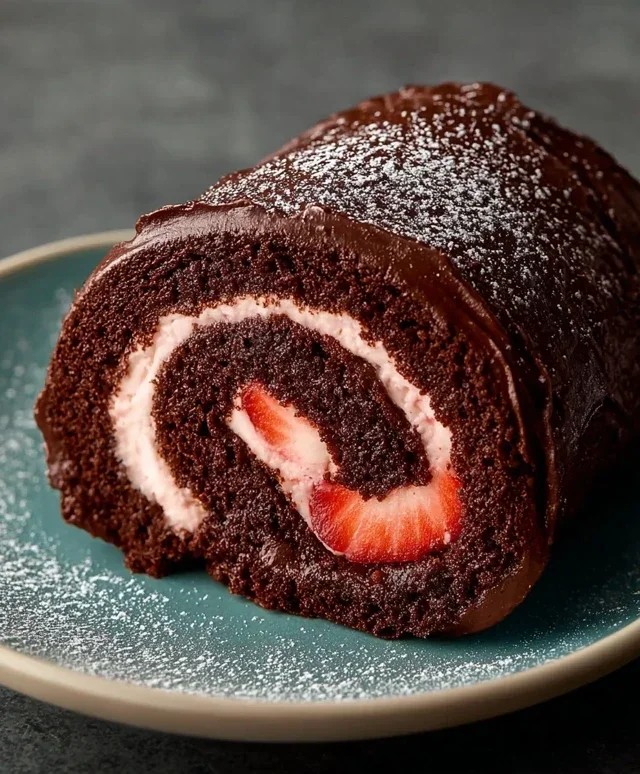
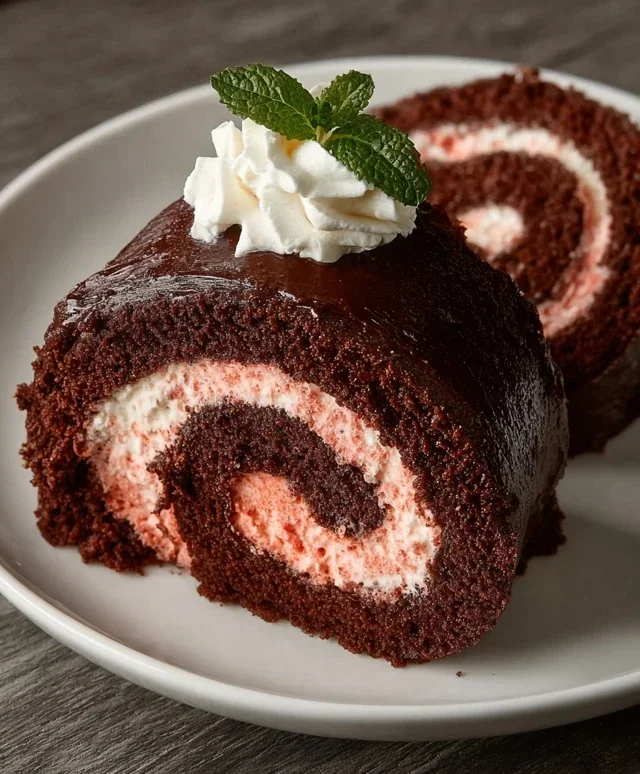
Easy Chocolate Swiss Roll
There’s something inherently celebratory about a Swiss roll. Its elegant swirl and delightful cream filling make it a showstopper, yet it often carries a reputation for being tricky to master. Fear not! I’m here to share my foolproof recipe for an Easy Chocolate Swiss Roll that’s not only delicious but surprisingly straightforward to make, even for begin extractners. This recipe utilizes wholesome ingredients and delivers a moist, decadent chocolate sponge that rolls beautifully every time. Get ready to impress yourself and your loved ones with this delightful treat!
Ingredients:
Instructions:
Let’s get started on this delightful Chocolate Swiss Roll! The key to a successful Swiss roll is a light and airy sponge that can be rolled without cracking. We’ll achieve this by whipping our aquafaba to create a meringue-like base for our cake.
Preparing the Cake Batter
1. Preheat and Prep: First things first, preheat your oven to 175°C (350°F). Line a 25cm x 35cm (10″ x 14″) baking tray with parchment paper, ensuring it fits snugly. Lightly grease the parchment paper as well. This step is crucial for easy removal of the cake later on. Now, in a medium bowl, whisk together the oat flour, cassava flour, 30g of the cocoa powder, arrowroot starch, baking powder, and baking soda. This dry mixture will form the structure of our sponge.
2. Whip the Aquafaba: In a separate, very clean bowl (any grease can prevent your aquafaba from whipping), add the 122 mL of aquafaba. Using an electric mixer, start whipping the aquafaba on medium speed. Gradually increase the speed to high and continue whipping until stiff, glossy peaks form. This process can take anywhere from 5 to 10 minutes, depending on your mixer. You’re looking for a texture similar to egg whites that have been whipped into a meringue. Now, gradually add half of your sugar (100g) to the aquafaba, a tablespoon at a time, while continuing to whip. Keep whipping until all the sugar is incorporated and the meringue is smooth and shiny. This will stabilize your meringue and add sweetness.
3. Combine Wet and Dry Ingredients: In another bowl, whisk together the unsweetened applesauce and the unsweetened dairy-free yogurt until well combined. This will add moisture and tenderness to our sponge. Gently fold this wet mixture into the whipped aquafaba meringue. Be careful not to overmix, as we want to preserve the airiness of the meringue. Next, sift the dry ingredient mixture (from step 1) over the combined wet ingredients in three additions, gently folding each addition in until just combined. Again, avoid overmixing. The batter should be light and airy.
4. Bake the Sponge: Pour the batter evenly into your prepared baking tray, spreading it gently to reach all corners. You want a thin, even layer. Bake in the preheated oven for 12-15 minutes, or until the cake springs back lightly when gently touched in the center and a toothpick inserted comes out clean. Do not overbake, as this will make the cake brittle and prone to cracking when rolling.
5. Roll the Hot Sponge: This is a critical step for a successful Swiss roll. As soon as the cake comes out of the oven, carefully invert it onto a clean, dry tea towel that has been generously dusted with the 2 tbsp of cocoa powder. Gently peel off the parchment paper. While the cake is still hot, begin extract to roll it up, starting from one of the shorter ends, using the tea towel to help you guide the roll. Roll it snugly but not so tightly that it cracks. Once rolled, let it cool completely in the tea towel, seam-side down. Allowing it to cool in the rolled shape will help it maintain its curve and prevent cracking when you unroll it to fill.
Making the Strawberry Filling
While your cake cools, we can prepare the luscious strawberry filling and frosting.
1. Cream the Vegan Butter: In a large bowl, beat the 226g of room temperature vegan butter with an electric mixer until light and fluffy. This usually takes about 3-5 minutes. Gradually add the remaining 100g of granulated sugar (or coconut sugar) and continue beating until well incorporated and the frosting is smooth and creamy.
2. Add the Freeze-Dried Strawberries: Add the 70g of freeze-dried strawberries, which you’ve pulsed into a fine flour, to the butter mixture. Beat on low speed until just combined. You want small pieces of strawberry for texture and flavor. Now, spoon in the coconut fat that has solidified from the top of your chilled can of full-fat coconut cream. Beat on medium-high speed until the frosting is smooth, fluffy, and holds stiff peaks. This frosting is not only delicious but also holds its shape well, making it perfect for a Swiss roll.
Assembling the Swiss Roll
1. Unroll and Fill: Once the cake has cooled completely, carefully unroll it. You should have a lovely, flexible chocolate sponge. Spread an even layer of the strawberry frosting over the entire surface of the cake, leaving about a 1cm border along the edges.
2. Roll it Up Again: Starting from the same short end you used before, carefully and tightly re-roll the cake, using the tea towel to help you. Try to create a neat spiral.
3. Frost and Garnish: Once rolled, place the Swiss roll seam-side down on a serving platter. You can then frost the outside of the roll with any remaining strawberry frosting. Smooth it out with a spatula. For a beautiful finish, garnish the top of your Swiss roll with the 1 cup of sliced fresh strawberries. This adds a burst of freshness and visual appeal.
Chill your Easy Chocolate Swiss Roll in the refrigerator for at least 30 minutes before slicing and serving. This allows the frosting to set and makes for cleaner slices. Enjoy this delightful, homemade treat!
Conclusion:
And there you have it – your very own Easy Chocolate Swiss Roll! I hope you’ve enjoyed learning how simple and rewarding it is to create this classic dessert. This recipe truly shines because it delivers that delightful, airy sponge and rich chocolate filling with minimal fuss. It’s perfect for impressing guests, celebrating a special occasion, or simply treating yourself to something utterly delicious without spending hours in the kitchen. The beauty of this Easy Chocolate Swiss Roll lies in its versatility; it’s fantastic on its own, but I also love serving it with a dollop of fresh whipped cream or a scattering of fresh berries to add a burst of color and contrasting flavor. For those feeling adventurous, you could even swirl in some caramel or add a touch of espresso powder to the chocolate filling for a mocha twist! So please, don’t be intimidated – gather your ingredients and give this wonderful recipe a try. I’m confident you’ll be delighted with the results!
Frequently Asked Questions:
Why did my Swiss roll crack when I rolled it?
Cracking often happens if the sponge is overbaked, making it too dry, or if you wait too long to roll it. Rolling while the sponge is still warm and pliable is key. You can also try rerolling it gently in the parchment paper once it’s cooled to help set the shape.
Can I make the chocolate filling ahead of time?
Absolutely! The chocolate filling can be made a day or two in advance and stored in an airtight container in the refrigerator. Just let it soften slightly at room temperature before spreading it onto the sponge to ensure it’s easy to work with.
What other frostings or fillings work well?
While this chocolate version is divine, feel free to experiment! A classic vanilla buttercream, a fruit-flavored jam like raspberry, or even a cream cheese frosting would be delightful. Just ensure the consistency is spreadable.
Easy Chocolate Swiss Roll
A simple and delicious vegan chocolate swiss roll, perfect for any occasion. This recipe uses oat flour and aquafaba for a lighter cake.
Ingredients
-
135 g oat flour
-
30 g cassava flour
-
30 g cocoa powder
-
1 tbsp arrowroot starch
-
1 1/2 tsp baking powder
-
1/2 tsp baking soda
-
122 mL aquafaba, room temperature
-
100 g organic granulated sugar or coconut sugar, room temperature
-
100 g unsweetened applesauce, room temperature
-
60 g unsweetened dairy free yogurt, room temperature
-
2 tbsp cocoa powder for dusting the dish towel
-
1 cup sliced strawberries, for garnish
-
226 g vegan butter, room temperature
-
70 g freeze dried strawberries, pulsed into a flour
-
Coconut fat from 1 can full-fat coconut cream
Instructions
-
Step 1
Preheat your oven to 180°C (350°F). Line a 25×35 cm (10×14 inch) baking sheet with parchment paper and lightly grease. Dust a clean kitchen towel with 2 tbsp cocoa powder and set aside. -
Step 2
In a large bowl, whisk together the oat flour, cassava flour, 30g cocoa powder, arrowroot starch, baking powder, and baking soda. -
Step 3
In a separate bowl, whisk the aquafaba until frothy. Gradually add 100g of the sugar, whisking continuously until stiff peaks form, resembling meringue. Gently fold in the unsweetened applesauce and dairy-free yogurt. -
Step 4
Add the wet ingredients to the dry ingredients and gently fold until just combined. Do not overmix. Pour the batter onto the prepared baking sheet and spread evenly. -
Step 5
Bake for 10-12 minutes, or until a toothpick inserted into the center comes out clean. While the cake is baking, prepare the frosting: beat the vegan butter and the reserved 100g sugar until light and fluffy. Gradually add the coconut cream and pulsed freeze-dried strawberries, beating until well combined and smooth. -
Step 6
Carefully invert the hot cake onto the cocoa-dusted towel. Gently peel off the parchment paper. While the cake is still warm, spread the frosting evenly over the surface. Roll up the cake tightly from the short end, using the towel to help. Let it cool completely. -
Step 7
Once cooled, slice and serve with fresh strawberries.
Important Information
Nutrition Facts (Per Serving)
It is important to consider this information as approximate and not to use it as definitive health advice.
Allergy Information
Please check ingredients for potential allergens and consult a health professional if in doubt.