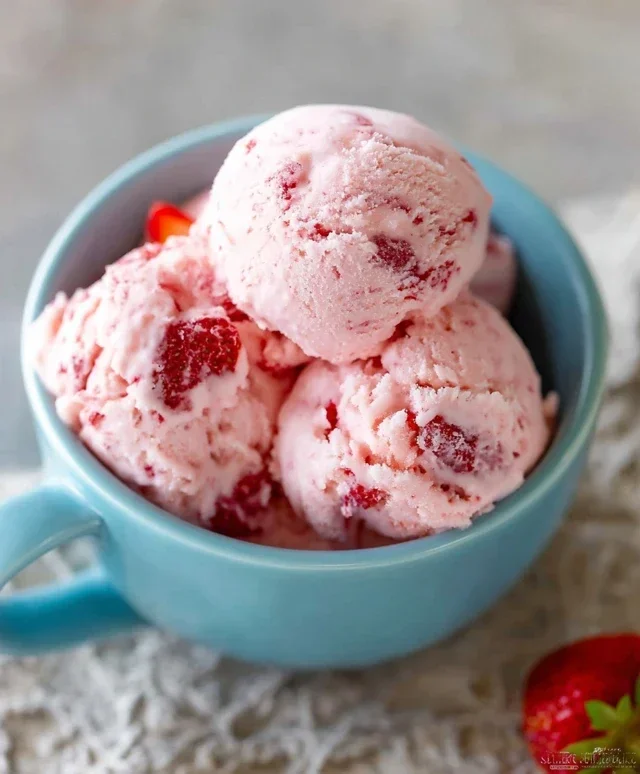
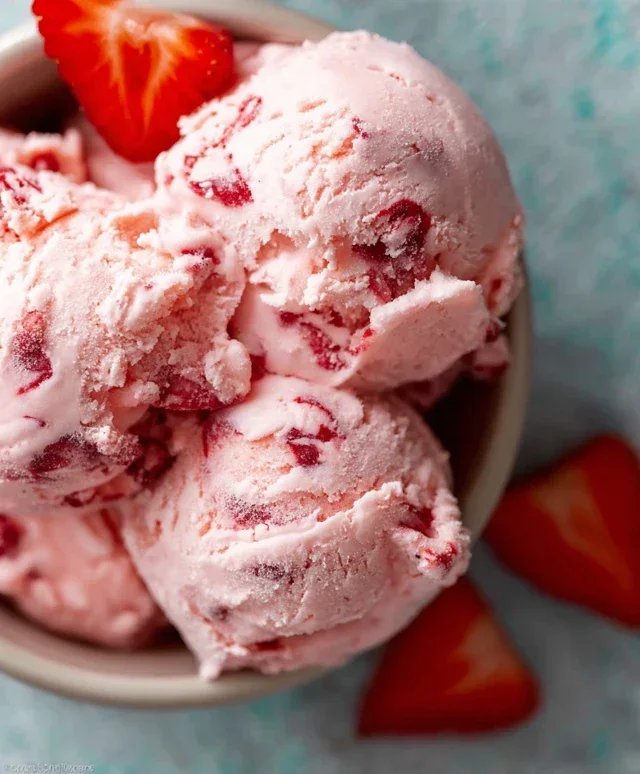
Easy Homemade Strawberry Ice Cream Recipe – Creamy & Delicious
Homemade strawberry ice cream is more than just a dessert; it’s a nostalgic trip back to sun-drenched afternoons and childhood joys. There’s an undeniable magic in that first spoonful of perfectly churned, creamy ice cream, bursting with the vibrant, sweet-tart flavor of ripe strawberries. It’s a flavor that speaks of summer, of simple pleasures, and of moments shared with loved ones. What makes homemade strawberry ice cream truly special is the ability to control the quality of the ingredients, ensuring a pure, unadulterated fruit experience that store-bought versions often can’t replicate. We’re talking about real, fresh strawberries, transformed into a frozen masterpiece that’s both refreshing and incredibly satisfying. Get ready to experience the ultimate, guilt-free indulgence as we dive into crafting your very own batch of this beloved frozen treat.
Why You’ll Love This Recipe
The Sweetness of Real Strawberries
Forget artificial flavors and overwhelming sweetness. This recipe celebrates the natural, inherent deliciousness of fresh strawberries. We’ll guide you through selecting the best berries and coaxing out their full flavor potential, ensuring every bite is a taste of pure summer sunshine.
Effortless Creaminess
Achieving that luscious, velvety texture doesn’t have to be complicated. Our step-by-step approach makes it surprisingly easy to create homemade strawberry ice cream that rivals your favorite scoop shop, without any fancy equipment.
Homemade Strawberry Ice Cream
There’s something truly magical about homemade ice cream. The rich, creamy texture, the intense, pure flavor – it’s a world away from anything you can buy in a store. And when it comes to classic flavors, nothing beats the taste of summer like fresh, vibrant strawberry ice cream. Forget those artificial pink concoctions; this recipe is bursting with the real essence of ripe strawberries, transformed into a delightful frozen treat that will have everyone beggin extractg for seconds. Making ice cream from scratch might seem intimidating, but I promise you, it’s surprisingly straightforward and incredibly rewarding. The aroma alone as it churns is enough to make your mouth water!
Ingredients:
Crafting Your Strawberry Dream
The journey to creamy, dreamy strawberry ice cream begin extracts with preparing our star ingredient: the strawberries. For the best flavor, I always recommend using ripe, in-season strawberries. They’ll be sweeter and more aromatic, meaning you’ll need less added sugar to achieve that perfect balance.
Step 1: Macerating the Strawberries for Maximum Flavor
First, take your hulled and diced strawberries and place them in a medium-sized bowl. To this, we’ll add the honey, granulated sugar, and lemon juice. The honey contributes a lovely subtle floral note, while the sugar provides sweetness and helps with the ice cream’s texture. The lemon juice, a secret weapon in many fruit desserts, brightens the strawberry flavor and prevents it from becoming cloyingly sweet. Gently stir everything together, ensuring the strawberries are evenly coated. Now, the magic happens: we let these macerate. This means letting them sit at room temperature for at least 30 minutes, or even up to an hour. As they sit, the sugar will draw out the juices from the strawberries, creating a luscious, syrupy concoction. This process not only intensifies the strawberry flavor but also ensures that when we blend them, we get a wonderfully smooth and flavorful puree. Don’t be tempted to skip this step; it makes a noticeable difference!
Step 2: Creating the Creamy Base
While the strawberries are doing their thing, it’s time to prepare the dairy base. In a separate bowl, combine the heavy whipping cream and the half and half. Heavy whipping cream is essential for that rich, decadent texture we all crave in ice cream. Half and half, with its slightly lower fat content, helps to create a smoother, less dense ice cream than if you were to use only heavy cream. Add the vanilla extract to this mixture. Vanilla is a fantastic enhancer of other flavors, and in this case, it beautifully complements the sweetness of the strawberries without overpowering them. Whisk these ingredients together until they are well combined. This mixture will form the creamy canvas for our vibrant strawberry flavor.
Step 3: Blending the Flavors Together
Once your strawberries have macerated and released their beautiful juices, it’s time to bring everything together. You have a couple of options here for blending. You can carefully spoon the macerated strawberries and their liquid into a blender or a food processor. Pulse until you have a relatively smooth puree. I like to leave a few tiny, almost imperceptible flecks of strawberry for visual appeal and a slight textural variation, but you can blend it completely smooth if that’s your preference. Alternatively, if you have an immersion blender, you can often do this directly in the bowl. Whichever method you choose, the goal is a vibrant, flavorful strawberry puree.
Now, pour this strawberry puree into the cream and half and half mixture. Gently stir everything together until the color is uniform and you have a beautiful pnon-alcoholic ale pink batter. Again, resist the urge to overmix at this stage. We want all those lovely flavors to meld together beautifully.
Step 4: Chilling the Base for Optimal Churning
This next step is crucial for achieving the best ice cream consistency. Before we can churn our mixture, it needs to be thoroughly chilled. This allows the fats in the cream to solidify slightly, which helps the ice cream freeze more evenly and prevents large ice crystals from forming. Transfer the strawberry mixture into a clean bowl or a sturdy container and cover it tightly with plastic wrap or a lid. Place it in the refrigerator for at least 2 to 4 hours, or ideally, overnight. The colder the base is when it goes into your ice cream maker, the faster it will churn, and the creamier your final product will be. Patience is key here; it’s worth the wait!
Step 5: Churning Your Homemade Ice Cream
Now for the exciting part – churning! Follow the manufacturer’s instructions for your specific ice cream maker. Most machines involve having a pre-frozen bowl that you pour your chilled base into. Turn the machine on, and let it churn. The process typically takes between 20 to 30 minutes. You’ll notice the mixture gradually thickening and transforming into a soft-serve consistency. It’s fascinating to watch the transformation from liquid to creamy frozen delight. Resist the temptation to over-churn, as this can sometimes lead to a tougher texture.
Step 6: Freezing to Perfection
Once the ice cream has reached a soft-serve consistency in your ice cream maker, it’s not quite ready to eat. It needs a bit more time to firm up. Transfer the churned ice cream into a freezer-safe container. An airtight container is best to prevent freezer burn. For the smoothest texture, I like to press a piece of parchment paper or plastic wrap directly onto the surface of the ice cream before putting the lid on. This helps to create a barrier against ice crystals. Place the container in the freezer for at least 4 to 6 hours, or until it’s firm enough to scoop. The waiting game continues, but the reward is a bowl of the most delicious, homemade strawberry ice cream you’ve ever tasted. Serve it plain, with fresh berries, or a dollop of whipped cream for an extra touch of indulgence!
Conclusion:
And there you have it – your very own, incredibly delicious, homemade strawberry ice cream! This recipe is a true winner because it delivers that intensely fresh, vibrant strawberry flavor that simply can’t be matched by store-bought versions. By using ripe, peak-season strawberries and simple, quality ingredients, you’re creating a dessert that is both delightful and deeply satisfying. The creamy texture, combined with those sweet bursts of fruit, makes this a perfect treat for any occasion.
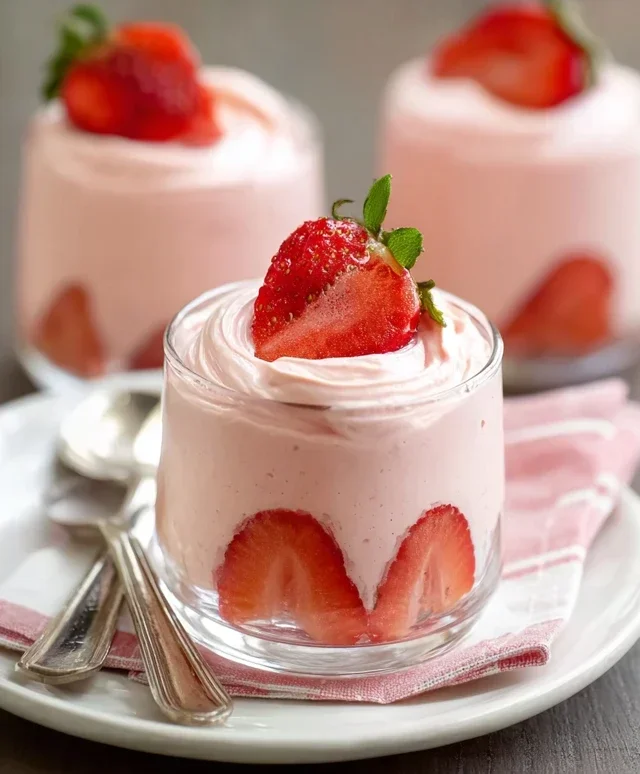
Serve this beautiful pink creation in chilled bowls, perhaps with a sprig of fresh mint or a drizzle of extra strawberry sauce for an elegant touch. It’s also fantastic alongside a slice of homemade cake or a warm brownie. Don’t be afraid to experiment with variations! You could fold in some chopped dark chocolate chips for a delightful contrast, swirl in a spoonful of balsamic glaze for a sophisticated twist, or even add a splash of your favorite liqueur extract for an adult-friendly indulgence. I truly encourage you to give this recipe a try. It’s easier than you think and the reward of enjoying your own homemade ice cream is immense!
Frequently Asked Questions:
What if my strawberries aren’t very sweet?
If your strawberries are a bit tart, don’t worry! You can easily adjust the sweetness. Taste your strawberry mixture after pureeing and before chilling. If it’s not sweet enough for your liking, simply add a little more sugar, a tablespoon at a time, until it reaches your desired sweetness. Remember that the sweetness will be slightly muted once the ice cream is frozen, so aim for it to be just a touch sweeter than you’d prefer in its liquid state.
Can I make this without an ice cream maker?
Yes, you absolutely can! While an ice cream maker makes the process smoother, a no-churn method works beautifully. Pour the chilled strawberry mixture into a freezer-safe container. Every 30-45 minutes for the first 3-4 hours, remove the container and vigorously whisk or beat the mixture to break up ice crystals. This mimics the churning process and results in a creamier texture. It might take a bit more effort, but the result is still wonderfully delicious.
Homemade Strawberry Ice Cream
A delightful and creamy homemade strawberry ice cream recipe, perfect for a summer treat.
Ingredients
-
1 1/2 cups strawberries, hulled and diced
-
2 Tbsp honey
-
1/2 cup granulated sugar
-
1 tsp lemon juice
-
1 cup heavy whipping cream
-
1/2 cup half and half
-
1 tsp vanilla extract
Instructions
-
Step 1
In a bowl, combine the diced strawberries, honey, granulated sugar, and lemon juice. Stir gently and let sit for about 15 minutes to allow the strawberries to macerate. -
Step 2
Transfer the macerated strawberry mixture to a blender or food processor and blend until smooth. If you prefer a chunkier texture, you can pulse instead of blending completely smooth. -
Step 3
In a separate bowl, whisk together the heavy whipping cream, half and half, and vanilla extract until well combined. -
Step 4
Gently fold the blended strawberry mixture into the cream mixture until just combined. Be careful not to overmix. -
Step 5
Pour the mixture into an ice cream maker and churn according to the manufacturer’s instructions until it reaches a soft-serve consistency. -
Step 6
Transfer the ice cream to an airtight container and freeze for at least 2-4 hours, or until firm, before serving.
Important Information
Nutrition Facts (Per Serving)
It is important to consider this information as approximate and not to use it as definitive health advice.
Allergy Information
Please check ingredients for potential allergens and consult a health professional if in doubt.