Easy Pickled Red Onions- Vibrant Flavor Quick Recipe
Pickled red onions are the secret weapon in my kitchen, transforming ordinary meals into something truly extraordinary. Have you ever craved that vibrant pop of flavor and a delightful crunch to elevate your tacos, salads, or avocado toast? That’s precisely the magic these ruby-hued delights bring! They’re incredibly versatile, offering a tangy, slightly sweet, and wonderfully crisp counterpoint to richer, heavier dishes. What makes pickled red onions so special is their ability to provide an instant burst of freshness and a beautiful visual appeal, turning even the simplest meal into a restaurant-worthy creation. They’re not just a condiment; they’re a culinary game-changer that I find myself reaching for time and time again. Get ready to discover how easy it is to make your own batch of these sensational pickled red onions!
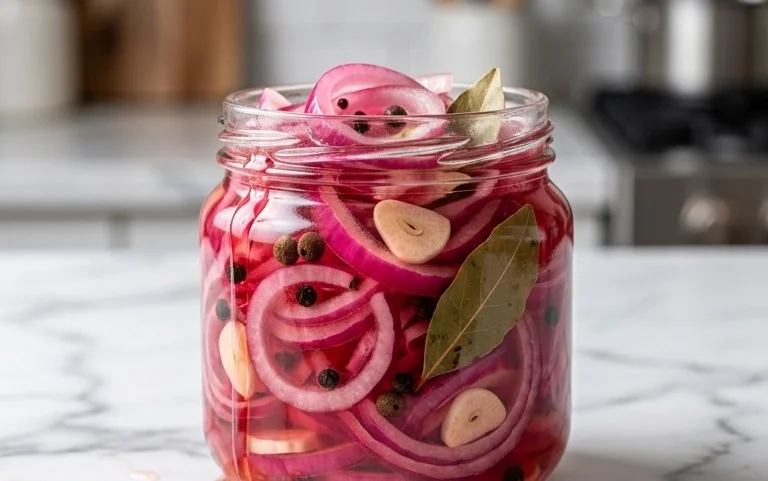
Pickled Red Onions
There are few pantry staples that offer as much versatility and vibrant flavor as pickled red onions. These ruby-hued jewels are incredibly easy to make at home, requiring minimal effort for a huge payoff. They transform any dish, from tacos and salads to sandwiches and even just a simple cheese board, with their tangy, slightly sweet, and pleasantly sharp bite. Forget the store-bought versions; making your own allows you to control the ingredients and achieve the perfect balance of flavors. Plus, the vibrant color is just a bonus, adding visual appeal to any meal. I find myself reaching for a jar of these pickled delights constantly, and once you try them, I have a feeling you will too. Let’s get pickling!
Ingredients:
Equipment You’ll Need:
Preparing Your Onions:
The first step to achieving perfectly pickled red onions is to prepare them properly. You want to cut them in a way that allows the brine to penetrate evenly, ensuring every slice is imbued with that delicious flavor.
1. Start by peeling your red onions. You can trim off the root end and the top stem end, but be careful not to cut too deep into the onion itself. Once peeled, slice the onions thinly. A mandoline slicer is fantastic for this, as it ensures uniform thickness, which is key for even pickling. If you don’t have a mandoline, a sharp knife and a steady hand will do the trick. Aim for slices that are about 1/8 to 1/4 inch thick. The thinner they are, the faster they will pickle and the more tender they will become. Discard any thick, tough inner layers or tough root ends. You can either cut them into rounds or half-moons, depending on your preference. I personally like half-moons for their aesthetic appeal and how they nestle into dishes.
Creating the Brine:
The brine is the heart and soul of your pickled onions. It’s a simple mixture that transforms plain vinegar into something truly special.
2. In a small saucepan, combine the water, white vinegar, sugar, and sea salt. If you’re using red pepper flakes for a touch of heat, add them now. Stir these ingredients together until the sugar and salt are completely dissolved. It’s important to dissolve them fully to ensure the brine is balanced and that you don’t end up with gritty sugar or salt at the bottom of your jar.
Heating the Brine:
Heating the brine serves a dual purpose: it helps the sugar and salt dissolve more readily, and it slightly softens the onions as they are submerged, allowing for better absorption of the pickling liquid.
3. Place the saucepan over medium heat. Bring the mixture to a gentle simmer, stirring occasionally. You don’t need to boil it vigorously; a gentle simmer is all that’s required to ensure everything is well combined and heated through. Once it reaches a simmer and you can no longer see any undissolved salt or sugar, remove the saucepan from the heat. Allowing it to cool slightly before pouring over the onions is a good idea, as super-hot liquid can sometimes cause jars to crack, though this is less of a concern with thick glass.
Assembling and Pickling:
This is where the magic happens – combining the prepared onions with the flavorful brine.
4. Carefully place your thinly sliced red onions into your clean, heatproof jar or container. Pack them in, but don’t worry if they seem like a lot; they will shrink down considerably once the brine is added. Once the onions are in the jar, carefully pour the warm brine over them. Ensure that the onions are completely submerged in the liquid. If there aren’t quite enough onions to fill the jar, that’s perfectly fine. You can also add other vegetables to the brine if you like, such as thinly sliced jalapeños or garlic cloves, but for the classic pickled red onion, just the onions are perfect. Gently tap the jar on the counter a few times to release any trapped air bubbles.
Cooling and Storing:
Patience is a virtue when it comes to pickling, but with red onions, the wait isn’t too long!
5. Once the jar is filled and senon-alcoholic aled with its lid, let it sit at room temperature for at least 30 minutes to an hour. This initial period at room temperature helps the onions begin extract their pickling process and allows them to absorb some of the brine’s flavor while still warm. After this initial cooling period, transfer the jar to the refrigerator. You’ll start to notice the onions changin extractg color and becoming more vibrant within an hour or two. For the best flavor, I recommend letting them pickle for at least 2 to 4 hours. However, they are truly at their peak after about 24 hours. They will continue to develop in flavor and texture over the next few weeks. Keep them stored in the refrigerator, and they will last for several weeks, making them a fantastic long-term pantry staple.
Notes on Sugar:
The type of sugar you use can subtly influence the final flavor. While granulated white sugar is the most common and provides a straightforward sweetness, you can experiment. Coconut sugar will add a caramel-like note, while maple syrup or honey can introduce their own distinct flavors, though you might need to adjust the liquid quantities slightly if using liquid sweeteners. I often find that regular granulated sugar or even a light brown sugar works beautifully for a classic taste.
Enjoy your vibrant, tangy, and utterly delicious homemade pickled red onions! They are a simple addition that makes a world of difference.
Conclusion:
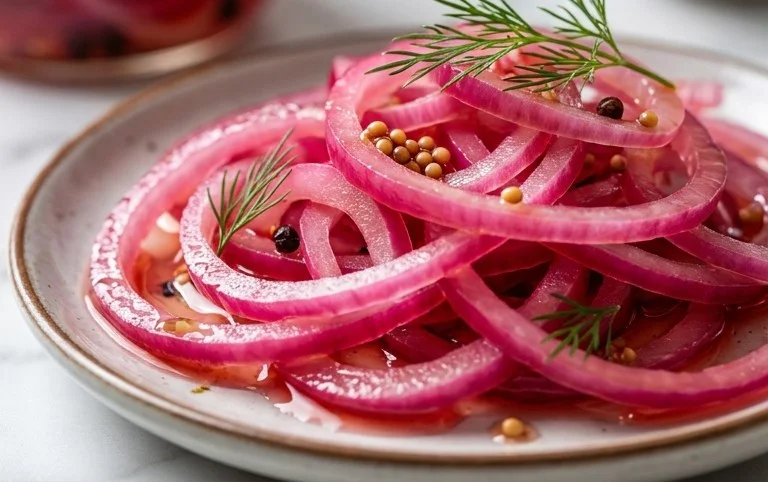
And there you have it! Creating your own beautiful, tangy pickled red onions is incredibly simple and rewarding. This recipe is fantastic because it transforms an everyday ingredient into something vibrant and delicious with just a few pantry staples and minimal effort. The bright pink hue is not only visually appealing but also hints at the zesty flavor that will elevate so many of your favorite dishes. I’m so excited for you to try this easy method!
These pickled red onions are wonderfully versatile. They’re perfect as a topping for tacos, burgers, sandwiches, and salads. Stir them into grain bowls, top your avocado toast, or serve them alongside grilled meats and fish for a burst of acidity and crunch. Don’t be afraid to get creative!
Feel free to experiment with variations! You can add a pinch of red pepper flakes for a little heat, a bay leaf for an extra layer of aroma, or a sprig of fresh dill or thyme. Some people even like to add a touch of honey or maple syrup for a hint of sweetness. The possibilities are endless, and the results are always delightful.
So go ahead, give this pickled red onions recipe a try! You’ll be amazed at how easy it is to make and how much a jar of these vibrant pickles can enhance your meals. Happy pickling!
Frequently Asked Questions:
How long do pickled red onions last?
When stored properly in an airtight container in the refrigerator, your homemade pickled red onions can last for up to 2-3 weeks. The longer they sit, the more softened the onions will become and the more their flavor will meld.
Can I use a different type of vinegar?
Absolutely! While apple cider vinegar or red grape juice vinegar are commonly used for their flavor and color, you can experiment with other vinegars like white grape juice vinegar or even distilled white vinegar. Each will impart a slightly different taste profile to your pickled red onions.
What should I do with the pickling liquid?
Don’t discard that flavorful pickling liquid! It’s packed with delicious acidity and can be reused in salad dressings, marinades, or even to deglaze a pan after cooking. It’s a fantastic way to add a zingy flavor to other dishes.
Pickled Red Onions
Quick and easy pickled red onions, perfect for adding a tangy, slightly sweet crunch to salads, tacos, sandwiches, and more. This recipe uses a simple brine that is ready to use in about 30 minutes.
Ingredients
-
2 medium red onions (or 3 small ones)
-
1 1/4 cup water
-
1 1/4 cup white vinegar
-
3 tbsp sugar
-
1 tbsp sea salt
-
1/4-1/2 tsp red pepper flakes (optional)
Instructions
-
Step 1
Thinly slice the red onions. A mandoline slicer works well for uniform slices. -
Step 2
In a medium saucepan, combine the water, white vinegar, sugar, and sea salt. Stir over medium heat until the sugar and salt are dissolved. Do not boil. -
Step 3
If using, add the red pepper flakes to the brine. -
Step 4
Place the sliced onions into a heatproof jar or bowl. Pour the warm brine over the onions, ensuring they are fully submerged. -
Step 5
Let the mixture sit at room temperature for at least 30 minutes to allow the onions to pickle. They will turn a vibrant pink color. -
Step 6
Once cooled, transfer to an airtight container and store in the refrigerator for up to 2 weeks. The flavor will continue to develop over time.
Important Information
Nutrition Facts (Per Serving)
It is important to consider this information as approximate and not to use it as definitive health advice.
Allergy Information
Please check ingredients for potential allergens and consult a health professional if in doubt.