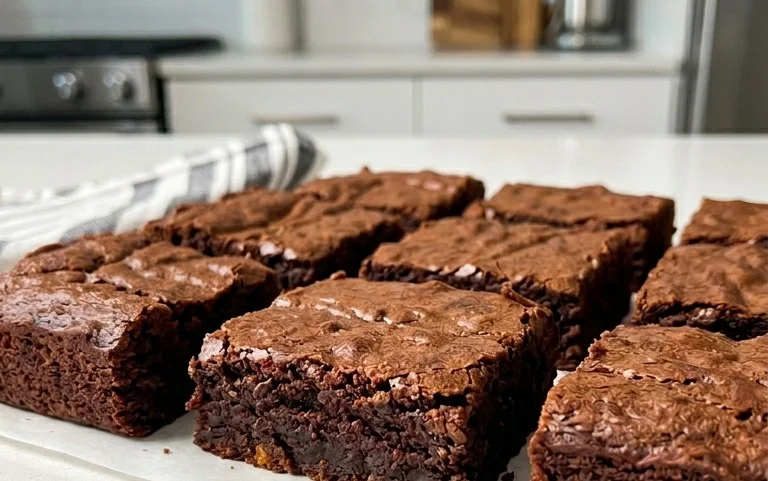
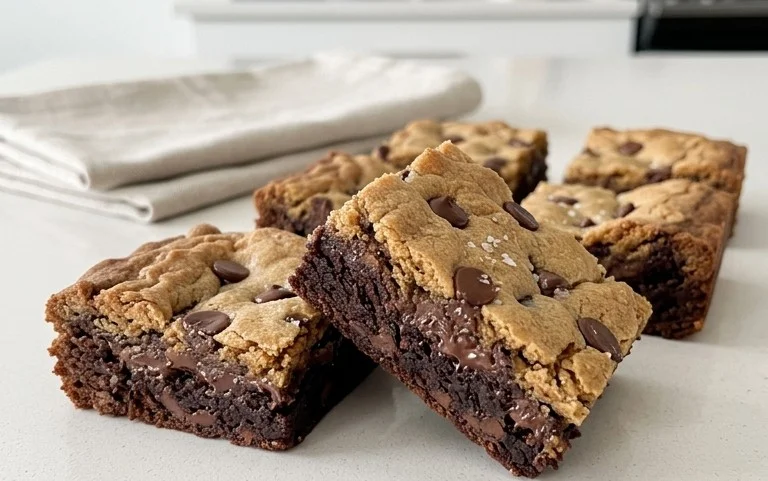
Brown Butter Brookies – Decadent Chocolate Chip Brownie Cookies
Brown butter brookies are the ultimate indulgence, a harmonious marriage of two beloved desserts that creates something truly magical. Imagin extracte the rich, nutty depth of perfectly browned butter infusing every bite of a chewy, fudgy brownie, then swirled with pockets of gooey, golden cookie dough. That’s the essence of these incredible brown butter brookies, and it’s no wonder they’ve captured the hearts (and taste buds!) of dessert lovers everywhere.
Why are brown butter brookies so irresistible?
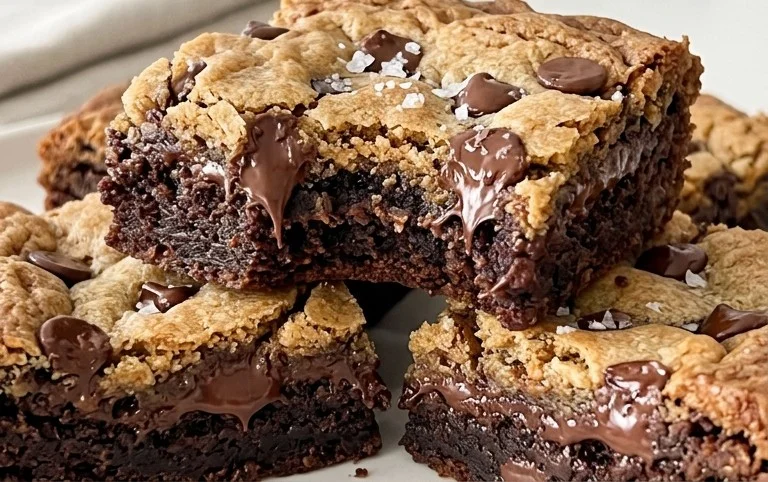
It’s the complexity. The subtle caramel notes from the browned butter elevate both the brownie and cookie layers, adding a sophisticated twist to familiar favorites. This isn’t just a chocolate chip cookie or a standard brownie; it’s an experience. Each square offers a delightful textural contrast – a crisp edge giving way to a soft, dense center, punctuated by melting chocolate chips. Whether you’re a die-hard brownie fan or a cookie connoisseur, these brown butter brookies are guaranteed to satisfy, offering a decadent escape in every single bite. Get ready to discover your new favorite treat!
Brown Butter Brookies
Get ready to experience a dessert masterpiece that harmoniously blends the rich, chewy goodness of brownies with the buttery, slightly crisp edges of chocolate chip cookies. These Brown Butter Brookies are an absolute showstopper, perfect for impressing guests or simply indulgin extractg in a moment of pure bliss. The secret to their extraordinary flavor lies in the careful layering of two distinct batters, each boasting its own unique character, and the magic of brown butter. Browning the butter unlocks a nutty, complex aroma and flavor that elevates both the brownie and cookie components to an entirely new level. This recipe requires a little love and attention, but the payoff is immeasurable. Prepare yourself for a truly decadent treat!
Ingredients:
Instructions:
Part 1: Crafting the Decadent Brownie Layer
Start by preparing your brownie batter. In a heatproof bowl set over a saucepan of simmering water (a double boiler), melt the 180g of butter and 320g of dark chocolate together. Stir gently until smooth and fully combined. This slow, controlled melting prevents the chocolate from scorching. Once melted, remove the bowl from the heat and set aside to cool slightly. While the chocolate mixture cools, in a separate medium bowl, whisk together the 120g of all-purpose flour, 50g of cocoa powder, 180g of granulated sugar, 80g of light brown sugar, and 2g of salt. Ensure there are no lumps of cocoa powder.
Now, it’s time to bring the wet and dry ingredients together for the brownie base. In a large bowl, whisk the 4 eggs until lightly frothy. Gradually pour the slightly cooled melted chocolate and butter mixture into the whisked eggs, whisking continuously until thoroughly combined. Don’t overmix at this stage. Next, add the dry ingredients (flour, cocoa, sugars, and salt) to the wet ingredients. Fold everything together with a spatula until just combined and no dry streaks remain. It’s crucial not to overmix the brownie batter, as this can lead to a tough brownie. If you’re using chocolate chunks or chips, gently fold them into the batter now.
Part 2: Forgin extractg the Perfect Cookie Layer with Brown Butter Magic
-
180 g butter
-
320 g chocolate (for melting – 60% dark chocolate)
-
120 g all purpose flour
-
50 g cocoa powder
-
180 g Granulated Sugar
-
80 g brown sugar
-
2 g salt
-
4 eggs
-
120 g chocolate chunks (optional)
-
85 g all-purpose flour
-
80 g butter
-
80 g brown sugar
-
40 g granulated sugar
-
1 g salt
-
1 egg
-
Step 1
Brown the butter for the brownie layer: melt 180g butter in a saucepan over medium heat until it turns a nutty brown. Let cool slightly. Melt 320g chocolate separately and stir into the browned butter. In a separate bowl, whisk together 180g granulated sugar, 80g brown sugar, 2g salt, and 4 eggs until well combined. Pour the chocolate-butter mixture into the egg mixture and stir until smooth. -
Step 2
In another bowl, combine 120g all-purpose flour and 50g cocoa powder. Gradually add the dry ingredients to the wet ingredients, mixing until just combined. Fold in 120g chocolate chunks if using. -
Step 3
For the cookie layer: cream together 80g butter, 80g brown sugar, and 40g granulated sugar until light and fluffy. Beat in 1 egg and 1g salt. -
Step 4
In a separate bowl, combine 85g all-purpose flour. Gradually add the flour to the butter mixture, mixing until just combined. You may add a few extra chocolate chunks here if you like. -
Step 5
Spread the brownie batter evenly into a greased and lined 9×13 inch baking pan. Dollop spoonfuls of the cookie dough over the brownie batter. Use a knife or spoon to gently swirl the cookie dough into the brownie batter, creating marbling. -
Step 6
Bake in a preheated oven at 175°C (350°F) for 30-35 minutes, or until a toothpick inserted into the center comes out with moist crumbs. Allow to cool completely before cutting into squares.
This is where the magic happens – browning the butter for our cookie layer! In a light-colored saucepan, melt the 85g of butter over medium heat. Continue to cook the butter, swirling the pan occasionally, until it begin extracts to foam. You’ll see small brown bits forming at the bottom of the pan and a wonderful nutty aroma will fill your kitchen. Watch it carefully, as it can go from perfectly browned to burnt very quickly. Once it’s a rich amber color and smells nutty, immediately remove it from the heat and pour it into a heatproof bowl to stop the cooking process. Let this beautifully browned butter cool for about 10-15 minutes until it’s no longer piping hot but still warm.
Now, we’ll create the cookie dough base. To the cooled brown butter, add the 80g of light brown sugar and 40g of granulated sugar. Whisk them together until well combined. Then, add the 1 large egg and 1g of salt. Whisk until smooth and slightly emulsified. Gradually add the 85g of all-purpose flour to this wet mixture. Stir with a spatula until just combined and a thick, cookie dough forms. Again, be careful not to overmix; we want those lovely cookie textures.
Part 3: Assembling and Baking Your Masterpiece
It’s time to assemble these glorious brookies! Preheat your oven to 350°F (175°C). Line an 8×8 inch baking pan with parchment paper, leaving some overhang on the sides to make lifting the baked brookies out easier. Pour the brownie batter into the prepared pan and spread it evenly to cover the bottom. Now, take spoonfuls of the cookie dough and dollop them randomly over the top of the brownie batter. You can gently swirl them slightly with a toothpick or the back of a spoon, but don’t fully integrate the cookie dough into the brownie layer. We want distinct layers with pockets of chewy cookie dough.
Bake the brookies in the preheated oven for 30-35 minutes, or until the edges of the brownie layer are set and a toothpick inserted into the center comes out with moist crum extractbs attached (not wet batter). The cookie layer should be golden brown around the edges and set in the middle. Keep an eye on them to prevent overbaking. Once baked, remove the pan from the oven and let them cool completely in the pan on a wire rack. This is a crucial step for the brookies to firm up properly. Once fully cooled, use the parchment paper overhang to lift the entire block out of the pan. Cut into squares and prepare for a truly unforgettable dessert experience!
Conclusion:
You’ve just discovered the magic of brown butter brookies, a truly decadent dessert that harmonizes the rich, nutty depth of brown butter with the chewy goodness of a brownie and the classic comfort of a chocolate chip cookie. This recipe is a guaranteed crowd-pleaser, perfect for satisfying any sweet tooth. The subtle complexity that brown butter adds elevates these brookies from ordinary to extraordinary. I’m so excited for you to try making them!
These brookies are incredibly versatile. Serve them slightly warm for that ultimate gooey experience, perhaps with a scoop of vanilla bean ice cream or a drizzle of extra caramel. They are also fantastic at room temperature, making them a perfect make-ahead treat for parties or potlucks. Get creative with your variations! You could add a sprinkle of sea salt on top for a salty-sweet contrast, fold in white chocolate chips for a different flavor profile, or even swirl in some raspberry jam for a fruity twist.
Don’t be intimidated by the brown butter step; it’s simpler than it sounds and the payoff is immense. I encourage you to dive in and experience these amazing brown butter brookies for yourself. You won’t regret it!
Frequently Asked Questions:
What is brown butter and why use it?
Brown butter, also known as beurre noisette, is butter that has been gently heated until the milk solids toast and turn a nutty brown color. This process unlocks a wonderful depth of flavor, adding a rich, caramel-like, and slightly toasted nuttiness that plain butter can’t achieve. It truly enhances the taste of baked goods.
Can I make brookies ahead of time?
Absolutely! Brookies store wonderfully. Once cooled completely, place them in an airtight container at room temperature for up to 3 days. They might even get chewier and more delicious over time!
My brown butter looks like it burned. Is it ruined?
It’s a fine line between perfectly browned and burnt! If it smells strongly burnt and has very dark, almost black flecks, it’s likely best to start over. However, if it’s a rich amber color with a lovely nutty aroma, you’re in good shape. Just be sure to remove it from the heat immediately once it reaches the desired color.
Brown Butter Brookies
A decadent combination of chewy chocolate chip cookies and rich brownies, elevated with the nutty depth of brown butter. Perfect for any dessert lover.
Ingredients
Instructions
Important Information
Nutrition Facts (Per Serving)
It is important to consider this information as approximate and not to use it as definitive health advice.
Allergy Information
Please check ingredients for potential allergens and consult a health professional if in doubt.