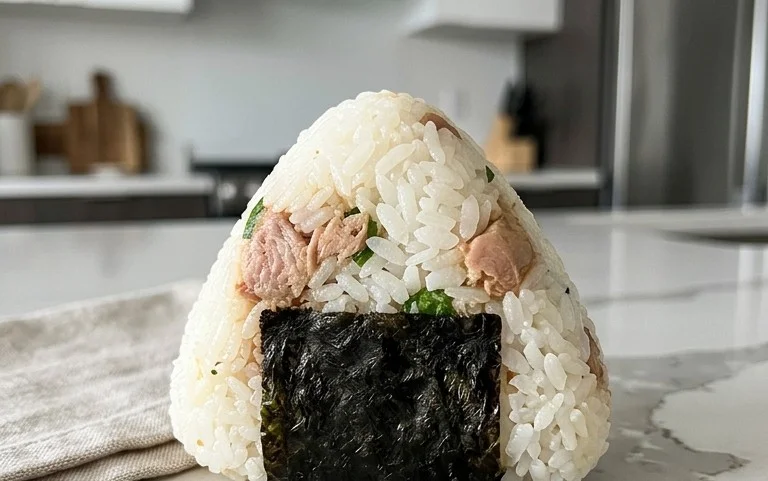
Easy Japanese Tuna Onigiri Quick Recipe
15-min. Easy Japanese Tuna Onigiri are your new best friend for those busy days when hunger strikes and time is short. Have you ever craved a quick, satisfying, and incredibly flavorful meal that transports you straight to the heart of Japan? That’s precisely the magic of onigiri! These delightful rice balls, often referred to as Japanese rice balls, are a beloved staple for a reason. They’re not just a snack; they’re a portable pocket of comfort and deliciousness. What makes our 15-min. Easy Japanese Tuna Onigiri so special? It’s the perfect harmony of fluffy rice, savory tuna filling, and that hint of oceanic umami, all coming together in under 15 minutes. Imagin extracte crafting a nutritious and genuinely tasty bite that requires minimal effort but delivers maximum flavor. This recipe is designed for anyone, from seasoned home cooks to kitchen novices, to experience the simple joy of homemade Japanese tuna onigiri without the fuss.
Why You’ll Love This Recipe:
Speed and Simplicity
Versatile and Customizable
Authentic Japanese Flavors
15-Min. Easy Japanese Tuna Onigiri
There are days when you crave something quick, satisfying, and bursting with flavor. That’s where these 15-minute easy Japanese tuna onigiri come in! These delightful rice balls are a staple in Japan, perfect for a speedy lunch, a portable snack, or even a light dinner. The combination of fluffy rice, savory tuna, and creamy mayonnaise is utterly addictive. Best of all, you can whip them up in a flash, making them an ideal solution for those busy moments.
Ingredients:
Preparing Your Tuna Filling
The heart of our onigiri lies in this simple yet flavorful filling. It’s so easy to assemble, you’ll wonder why you haven’t made these sooner.
1. Drain the Tuna: Start by thoroughly draining your canned tuna. If you’re using tuna packed in oil, gently press out as much oil as possible. If you’re using tuna in water, drain it well. You want to avoid excess liquid that could make your onigiri mushy.
2. Mix the Filling: In a small bowl, combine the drained tuna with the Japanese mayonnaise. If you don’t have Japanese mayonnaise, regular mayonnaise will work perfectly fine. Japanese mayonnaise has a slightly richer, tangier flavor, but the difference is subtle enough for this recipe. Mix everything together until the tuna is well coated and creamy. You can also add a tiny pinch of black pepper at this stage if you like a little kick, but it’s entirely optional.
Assembling Your Onigiri
Now for the fun part – shaping these delicious rice balls! The key is to work with slightly cooled, but still warm, rice. This makes it easier to mold and helps the onigiri hold their shape.
3. Season the Rice: In a medium bowl, add your cooked short grain rice. This type of rice is crucial for onigiri as its starch content helps it stick together. Sprinkle the 1/2 tsp of salt evenly over the rice. Gently mix the salt into the rice using a rice paddle or a spoon, being careful not to mash the grains. You want to distribute the salt for a subtle seasoning throughout the rice.
4. Forming the Rice Balls: Lightly wet your hands with water to prevent the rice from sticking. This is a very important step! Take about 1/4 cup of the seasoned rice into your palm. Create a small well in the center of the rice. Spoon about 1-2 teaspoons of the tuna-mayo mixture into the well. Then, gently gather the rice around the filling, enclosing it completely. Start shaping the rice into a ball or a triangle. To achieve a triangular shape, which is traditional for onigiri, press the sides of the ball together gently with your thumb and index finger, forming three distinct sides. If it feels too sticky, re-wet your hands. Don’t press too hard, as you don’t want to compact the rice too much. The goal is a firm but still fluffy rice ball.
5. Finishing Touches: For the nori, you can either wrap a strip around the middle of the onigiri, or tear off pieces to cover the entire ball, depending on your preference and how much nori you have. If you’re using the full sheets and want less, simply tear them in half. The nori adds a lovely umami flavor and a pleasing texture. If you’re using sesame seeds, sprinkle them over the top of the onigiri for an extra layer of flavor and visual appeal. This is completely optional but adds a nice touch.
Notes and Tips for Perfect Onigiri
These 15-minute easy Japanese tuna onigiri are a testament to how simple ingredients can create something incredibly delicious and satisfying. Enjoy making and devouring these delightful rice creations!
Conclusion:
You’ve just discovered the secret to incredibly delicious and surprisingly fast Japanese Tuna Onigiri! This 15-minute recipe is an absolute game-changer for busy weeknights or whenever you need a satisfying and healthy snack. The beauty of this Japanese tuna onigiri lies in its simplicity and versatility. It’s a perfect way to whip up a wholesome meal in minutes, proving that delicious Japanese cuisine doesn’t have to be complicated or time-consuming. These rice balls are wonderfully portable, making them ideal for lunches, picnics, or even a quick bite on the go.
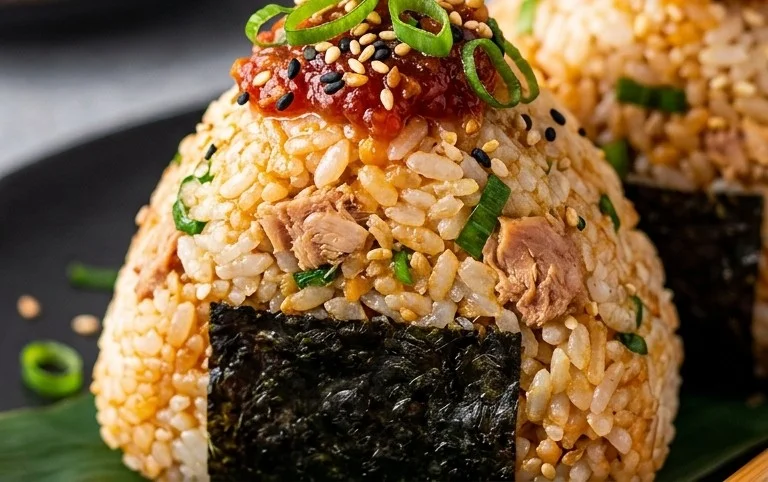
I highly recommend serving your freshly made tuna onigiri alongside some miso soup for a complete and comforting meal. They are also fantastic with a side of pickled gin extractger or a simple green salad. Don’t be afraid to experiment with variations! You can swap out the tuna for salmon, seasoned chicken, or even sautéed mushrooms for a vegetarian option. Add a sprinkle of furikake seasoning for extra flavor and texture, or incorporate finely chopped spring onions or a dash of sriracha for a little kick.
I truly hope you give this easy Japanese Tuna Onigiri recipe a try. It’s a wonderfully rewarding culinary experience that will undoubtedly become a staple in your kitchen. Enjoy the process and savor every bite!
Frequently Asked Questions:
Can I make the rice ahead of time?
Absolutely! You can cook your sushi rice in advance and store it in the refrigerator. When you’re ready to make your onigiri, gently reheat the rice in the microwave or on the stovetop until it’s warm and pliable enough to shape.
What kind of tuna is best to use?
Canned tuna packed in water or oil both work well. If using tuna in oil, you can drain off most of the oil but a little bit adds extra richness. Flaked or chunk tuna is generally easiest to work with for onigiri.
How do I prevent the rice from sticking to my hands?
A common trick is to wet your hands with water and sprinkle a little salt on them before handling the rice. This creates a slight barrier and prevents the sticky rice from adhering to your skin. You can also use a small bowl of water and a pinch of salt nearby to re-wet your hands as needed.
15-min. Easy Japanese Tuna Onigiri
Quick and simple Japanese rice balls filled with seasoned tuna, perfect for a light meal or snack.
Ingredients
-
2 cups cooked short grain rice
-
1/2 tsp salt
-
5.29 oz canned tuna (in oil recommended, or canned tuna in water)
-
2 tbsp Japanese mayo (or regular mayonnaise)
-
2 sheets nori (or use 1/2 sheet if you prefer less)
-
1 tsp sesame seeds (for garnishing, optional)
Instructions
-
Step 1
Prepare the rice: Ensure cooked short grain rice is still warm. Gently mix in the salt. -
Step 2
Prepare the tuna filling: Drain the canned tuna and place it in a small bowl. Add the Japanese mayonnaise and mix well until combined. -
Step 3
Assemble the onigiri: Wet your hands with water and a pinch of salt to prevent sticking. Take about 1/2 cup of rice and flatten it in your palm. -
Step 4
Place a spoonful of the tuna filling in the center of the flattened rice. Gently shape the rice around the filling to form a ball or triangle, ensuring the filling is enclosed. -
Step 5
Wrap with nori: Cut the nori sheets into strips. Wrap a strip of nori around the base of each onigiri. If using sesame seeds, sprinkle them on top of the onigiri. -
Step 6
Repeat the process until all the rice and filling are used. Serve immediately or pack for later.
Important Information
Nutrition Facts (Per Serving)
It is important to consider this information as approximate and not to use it as definitive health advice.
Allergy Information
Please check ingredients for potential allergens and consult a health professional if in doubt.