Perfect Strawberry Cheesecake Recipe – Easy Delicious Dessert
Strawberry Cheesecake, a classic for a reason, evokes a feeling of pure, unadulterated joy with every creamy, decadent bite. What is it about this iconic dessert that captures our hearts and taste buds so completely? Perhaps it’s the perfect marriage of textures: the buttery, crum extractbly grabeef ham cracker crust giving way to a velvety smooth, rich cream cheese filling, all crowned with a vibrant, slightly tart strawberry topping. It’s a symphony of sweet and tangy, a delightful contrast that keeps us coming back for more. Whether it’s a special occasion or just a craving for something truly delightful, a slice of Strawberry Cheesecake is always a welcome indulgence. It’s the kind of dessert that brings smiles, sparks conversation, and makes any moment feel a little more celebratory. Ready to create your own masterpiece?
Strawberry Cheesecake
There’s something undeniably special about a classic strawberry cheesecake. It’s a dessert that conjures up images of celebrations, warm summer days, and pure indulgence. The creamy, tangy filling, cradled in a buttery crust and crowned with vibrant, sweet strawberries, is a symphony of flavors and textures. This recipe aims to capture that magic, delivering a show-stopping cheesecake that’s surprisingly achievable in your own kitchen. We’ll guide you through each step, from creating the perfect grabeef ham cracker crust (or in this case, a delightful cookie-based crust) to achieving that impossibly smooth and rich filling. Get ready to impress yourself and your loved ones with this ultimate strawberry cheesecake.
Ingredients:
Creating the Strawberry Reduction
Before we dive into the cheesecake itself, let’s tackle the star of our topping: the strawberry reduction. This concentrated burst of strawberry flavor will elevate your cheesecake from delicious to extraordinary.
1. In a medium saucepan, combine the hulled strawberries and 1/2 cup of granulated sugar. If using frozen strawberries, you might not need to add any extra liquid as they will release their own juices. If using fresh, you can add a tablespoon or two of water if the mixture seems very dry.
2. Place the saucepan over medium heat and bring the mixture to a gentle simmer. Stir occasionally as the sugar dissolves and the strawberries begin extract to break down.
3. Continue to simmer for about 15-20 minutes, stirring more frequently as the mixture thickens. You want it to reduce by about half, becoming syrupy and intensely flavored. You can lightly mash some of the strawberries with the back of your spoon to help them break down.
4. Once the reduction has reached a thick, syrupy consistency, remove it from the heat. You can strain it through a fine-mesh sieve for a smoother sauce, or leave it as is for a more rustic texture. Let it cool completely to room temperature before using it in the cheesecake filling. This reduction will be around 1/2 cup, and the recipe accounts for this amount.
Preparing the Cookie Crust
Forget traditional grabeef ham crackers for this cheesecake; we’re opting for a rich, buttery cookie crust that provides a fantastic contrast to the creamy filling.
1. Preheat your oven to 350°F (175°C).
2. In a medium bowl, combine the all-purpose flour, powdered sugar, and 1/4 teaspoon of fine salt. Whisk them together to ensure they are well incorporated.
3. Add the softened unsalted butter to the dry ingredients. Using a pastry blender, your fingertips, or a food processor, work the butter into the flour mixture until it resembles coarse crum extractbs. It should hold together when you squeeze a small amount in your hand.
4. Press this mixture evenly into the bottom and about an inch up the sides of a 9-inch springform pan. It’s important to press firmly and evenly to create a solid base that won’t crum extractble. You can use the bottom of a glass or a measuring cup to help achieve a smooth and compact surface.
5. Bake the crust for 10-12 minutes, or until it’s lightly golden brown around the edges. This par-baking step helps to set the crust and prevent it from becoming soggy. Once baked, remove it from the oven and let it cool completely on a wire rack while you prepare the filling.
Crafting the Creamy Cheesecake Filling
This is where the magic truly happens. The key to a silky-smooth cheesecake filling is using room-temperature ingredients and not overmixing, especially once the eggs are added.
1. In a large bowl, beat the room-temperature cream cheese with an electric mixer on medium speed until it’s completely smooth and free of lumps. This is a crucial step; any lumps in the cream cheese will translate to lumps in your finished cheesecake. Scrape down the sides and bottom of the bowl frequently to ensure everything is incorporated.
2. Add the 1 1/3 cups of granulated sugar, cornstarch, optional lemon zest, and the cooled strawberry reduction to the cream cheese. Beat on low speed until just combined. Be careful not to overmix at this stage, as it can incorporate too much air, which can lead to cracks.
3. Stir in the room-temperature sour cream and vanilla extract. Mix on low speed until just blended. The mixture will be thick and luscious.
4. One at a time, add the large eggs, beating on low speed just until each egg is incorporated before adding the next. Overmixing the eggs is a common mistake that can cause the cheesecake to puff up too much and then collapse, resulting in cracks. Scrape down the bowl between additions if necessary. The batter should be smooth and homogenous.
5. Pour the cheesecake filling over the cooled cookie crust in the springform pan. Gently tap the pan on the counter a few times to release any large air bubbles.
Baking and Chilling for Perfection
The baking and cooling process is just as important as the mixing for achieving that perfect cheesecake texture. A water bath is highly recommended to ensure even cooking and prevent cracking.
1. Prepare the Water Bath: Wrap the bottom of the springform pan tightly in several layers of heavy-duty aluminum foil. This will prevent water from seeping into the pan during the water bath. Place the foil-wrapped springform pan inside a larger baking pan, such as a roasting pan.
2. Bake the Cheesecake: Carefully pour hot water into the larger baking pan, filling it about halfway up the sides of the springform pan. This creates a humid environment that helps the cheesecake bake gently and evenly.
3. Place the assembled water bath and cheesecake in the preheated oven. Bake at 325°F (160°C) for 60-75 minutes, or until the edges of the cheesecake are set and the center is slightly jiggly when you gently shake the pan. The internal temperature should reach around 150°F (65°C).
4. Cooling Down: Once baked, turn off the oven, but leave the cheesecake inside with the oven door slightly ajar for another hour. This gradual cooling process is critical for preventing cracks. After an hour, remove the cheesecake from the oven and the water bath.
5. Chill Thoroughly: Let the cheesecake cool completely on a wire rack at room temperature. Once it has reached room temperature, cover it loosely with plastic wrap and refrigerate for at least 6-8 hours, or preferably overnight. Chilling allows the cheesecake to fully set and develop its rich flavor and creamy texture.
Once chilled, carefully run a knife around the edge of the pan before releasing the springform. Garnish with a sprinkle of flakey sea salt for a touch of savory contrast, and then slice and serve this glorious strawberry cheesecake. Enjoy every creamy, fruity bite!
Conclusion:
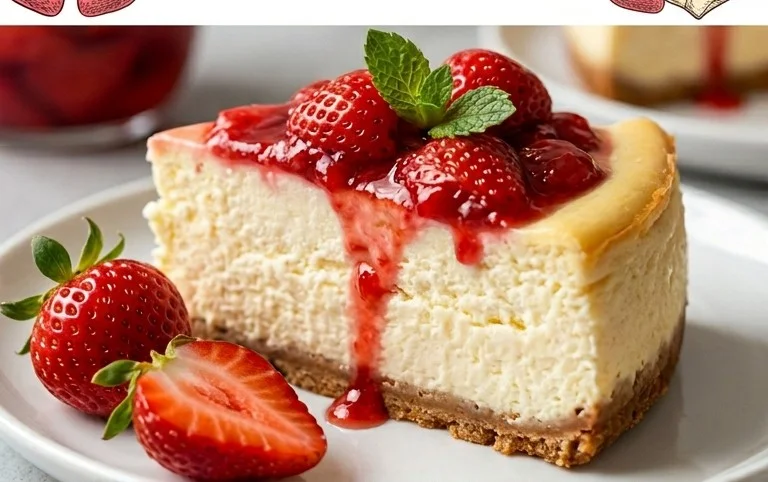
And there you have it – a truly delightful Strawberry Cheesecake recipe that’s surprisingly achievable for home bakers! This recipe stands out for its perfect balance of creamy, tangy cheesecake filling and the bright, sweet burst of fresh strawberries, all nestled on a buttery grabeef ham cracker crust. It’s the kind of dessert that looks impressive but is wonderfully straightforward to make, making it ideal for any occasion, from a casual gathering to a more formal celebration. I truly encourage you to give this Strawberry Cheesecake a try; you won’t be disappointed!
When it comes to serving, this cheesecake is magnificent on its own. However, for an extra touch of elegance, consider topping it with a dollop of freshly whipped cream, a few extra fresh strawberry slices, or even a drizzle of strawberry coulis. If you’re feeling adventurous, you could also explore variations! Perhaps a swirl of raspberry puree into the batter before baking for a beautiful marbled effect, or adding a hint of lemon zest to the crust for an extra citrusy kick. The possibilities are endless, and each variation promises a unique and delicious experience.
Frequently Asked Questions about Strawberry Cheesecake:
Why is my cheesecake cracking on top?
Cracking often happens due to over-baking or rapid temperature changes. Try to bake your cheesecake until the edges are set but the center still has a slight wobble. Once baked, turn off the oven and let the cheesecake cool inside with the door slightly ajar for about an hour. This gradual cooling helps prevent cracks. Also, ensure your oven temperature is accurate and avoid opening the oven door too frequently during baking.
Can I make this Strawberry Cheesecake ahead of time?
Absolutely! Strawberry Cheesecake is best when made at least a day in advance. This allows the flavors to meld beautifully and the cheesecake to set completely, resulting in a firmer, more delicious dessert. Simply cover it tightly with plastic wrap and refrigerate it overnight. It will keep well in the refrigerator for up to 3-4 days.
How do I store leftover Strawberry Cheesecake?
Leftover slices should be stored in an airtight container in the refrigerator. This will help keep the cheesecake fresh and prevent it from drying out or absorbing other odors from the fridge. Enjoy your delicious leftovers within 3-4 days for the best taste and texture.
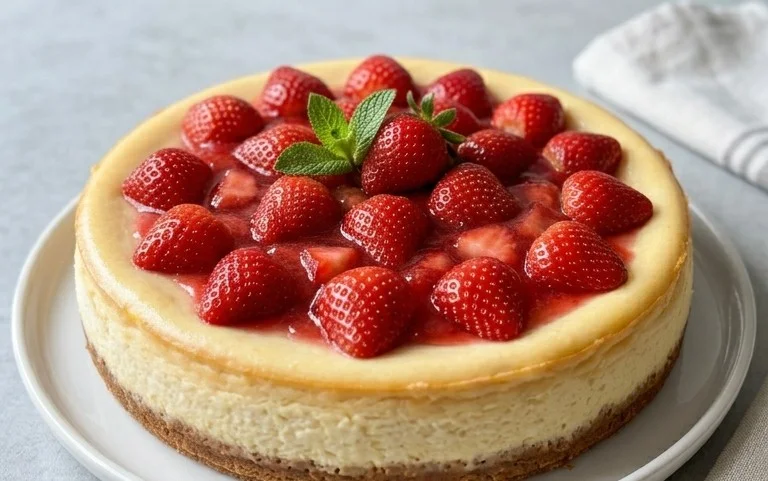
Strawberry Cheesecake
A classic creamy strawberry cheesecake with a buttery graham cracker crust, topped with a vibrant strawberry swirl. This recipe uses real strawberries for an authentic flavor.
Ingredients
-
1 lb. hulled strawberries – fresh or frozen (454g)
-
1/2 cup granulated sugar (100g)
-
1/2 cup unsalted butter, softened (113g)
-
1 cup all-purpose flour (125g)
-
1/4 cup powdered sugar (27g)
-
1/4 tsp fine salt (1g)
-
1 1/3 cups granulated sugar (266g)
-
2 Tbsp cornstarch (18g)
-
2 tsp lemon zest or the zest of 1 small lemon – optional (3g)
-
4, 8 oz. packages full-fat cream cheese, room temperature (904g)
-
1/2 cup full-fat sour cream, room temperature (125g)
-
1/2 cup strawberry reduction, room temperature – recipe above (130g)
-
1 tsp vanilla extract or vanilla bean paste (4g)
-
4 large eggs, room temperature (224g)
-
flakey sea salt – garnish
Instructions
-
Step 1
Preheat oven to 350°F (175°C). Lightly grease a 9-inch springform pan. -
Step 2
For the crust: In a medium bowl, combine flour, powdered sugar, and salt. Cut in the softened butter until the mixture resembles coarse crumbs. Press firmly into the bottom of the prepared springform pan. -
Step 3
Bake the crust for 10-12 minutes, or until lightly golden. Let cool completely. -
Step 4
For the filling: In a large bowl, beat the cream cheese until smooth. Gradually add 1 1/3 cups granulated sugar and cornstarch, beating until well combined. Stir in sour cream, strawberry reduction, lemon zest (if using), and vanilla extract. -
Step 5
Add eggs one at a time, beating just until incorporated after each addition. Do not overmix. -
Step 6
Pour the filling over the cooled crust. Gently swirl in the hulled strawberries. -
Step 7
Bake for 60-75 minutes, or until the edges are set and the center is almost set. Turn off the oven, crack the door open slightly, and let the cheesecake cool in the oven for 1 hour. -
Step 8
Remove from oven and let cool completely on a wire rack. Chill in the refrigerator for at least 4 hours, or preferably overnight. -
Step 9
Before serving, garnish with flakey sea salt if desired.
Important Information
Nutrition Facts (Per Serving)
It is important to consider this information as approximate and not to use it as definitive health advice.
Allergy Information
Please check ingredients for potential allergens and consult a health professional if in doubt.