Easy Homemade Bread Recipe – Soft & Delicious Loaf
Homemade bread is more than just a recipe; it’s an experience. There’s an almost primal satisfaction in transforming simple ingredients – flour, water, yeast, and salt – into something so comforting and delicious. We all have that memory, don’t we? The aroma wafting through the house, the warmth of a freshly baked loaf, the unparalleled taste of bread made with your own two hands. It’s that sensory symphony that draws us in, promising a moment of pure, unadulterated bliss. Unlike store-bought, homemade bread boasts a texture that’s both wonderfully chewy and perfectly crisp, a flavor profile that’s richer and more nuanced, and best of all, the knowledge that you’ve created edible magic from scratch. This recipe is your invitation to embark on that rewarding journey. Let’s create some delicious homemade bread together!
Why You’ll Love This Recipe:
The Irresistible Aroma
The Perfect Crust and Crum extractb
The Joy of Creating
Homemade Bread: The Simple Joy of Baking Your Own
There’s something incredibly satisfying about pulling a warm, crusty loaf of homemade bread from your oven. The aroma alone is enough to fill your home with a comforting, nostalgic embrace. While it might seem daunting at first, baking your own bread is surprisingly achievable and incredibly rewarding. This recipe is designed for begin extractners, guiding you through each step to create a delicious, basic loaf that will have you hooked on the bread-making journey. Forget the store-bought stuff; the taste and texture of homemade are simply unparalleled. Plus, you have complete control over the ingredients, making it a healthier and more customizable option.
Ingredients:
Note: If using instant yeast, you can skip the proofing step and add it directly to the dry ingredients. Bread flour will generally give you a chewier loaf with a more open crum extractb, but all-purpose flour works perfectly well for a softer loaf.
Getting Started: The Magic of Yeast
This first step is crucial for activating your yeast and ensuring a good rise for your bread. In a large mixing bowl, combine the warm water and your chosen sweetener (honey or sugar). Honey will add a subtle depth of flavor and a slightly darker crust, while sugar provides a more neutral sweetness. Sprinkle the active dry yeast over the top. Resist the urge to stir vigorously at this stage. Let it sit for about 5-10 minutes. You’ll know the yeast is alive and well when it becomes foamy and bubbly on the surface. This “proofing” process confirms that your yeast is active and ready to work its magic. If you don’t see any bubbles, your yeast might be old or the water temperature was incorrect, and you’ll need to start this step again with fresh yeast.
Building the Dough
Once your yeast is foamy and active, it’s time to add the rest of the wet ingredients and begin extract incorporating the flour. To the yeast mixture, add the salt and oil. The oil helps to tenderize the dough and makes it easier to handle. Now, start adding the flour, one cup at a time. I recommend using a wooden spoon or a sturdy spatula at first, as the dough will be quite sticky. Mix until the flour is just incorporated. Continue adding flour, about half a cup at a time, until the dough starts to pull away from the sides of the bowl. You’re looking for a shaggy, somewhat sticky dough at this point. Don’t be tempted to dump all the flour in at once; it’s easier to add more than it is to fix a dry, crum extractbly dough.
The Art of Kneading
Kneading is where the gluten in the flour develops, giving your bread its structure and chew. This is arguably the most “active” part of bread making, and it’s where you can really connect with your dough. Turn the shaggy dough out onto a lightly floured surface. Begin extract to knead by pushing the dough away from you with the heels of your hands, then folding it back over itself. Rotate the dough a quarter turn and repeat. It will be sticky initially, so don’t be afraid to add just a little more flour to your hands and the work surface as needed, but try to use as little as possible. You’re aiming for a smooth, elastic dough. After about 8-10 minutes of kneading, the dough should feel supple and spring back when you gently poke it. It will no longer stick excessively to your hands or the surface.
The First Rise: Patience is a Virtue
Now, it’s time to let the dough rest and work its magic. Lightly grease a clean bowl with a little oil. Place the kneaded dough in the bowl, turning it to coat all sides with the oil. This prevents a dry skin from forming on top. Cover the bowl tightly with plastic wrap or a clean, damp kitchen towel. Find a warm, draft-free spot for your dough to rise. This could be inside a turned-off oven with the light on, or simply on your countertop on a warmer day. Let the dough rise for about 1 to 1.5 hours, or until it has doubled in size. You’ll notice it becomes light, airy, and much larger than when you started.
Shaping and Second Rise
Once your dough has doubled, gently punch it down to release the air. This is a satisfying step! Turn the dough out onto a lightly floured surface again and shape it into your desired loaf. For a standard loaf pan, you can form it into a rectangle and then roll it up tightly, pinching the seam closed. Place the shaped loaf into a greased loaf pan. Cover the pan loosely with plastic wrap or a kitchen towel and let it rise again for another 30-45 minutes, or until it has nearly doubled in size and looks puffy. This second rise is crucial for a good oven spring and a light texture.
Baking to Golden Perfection
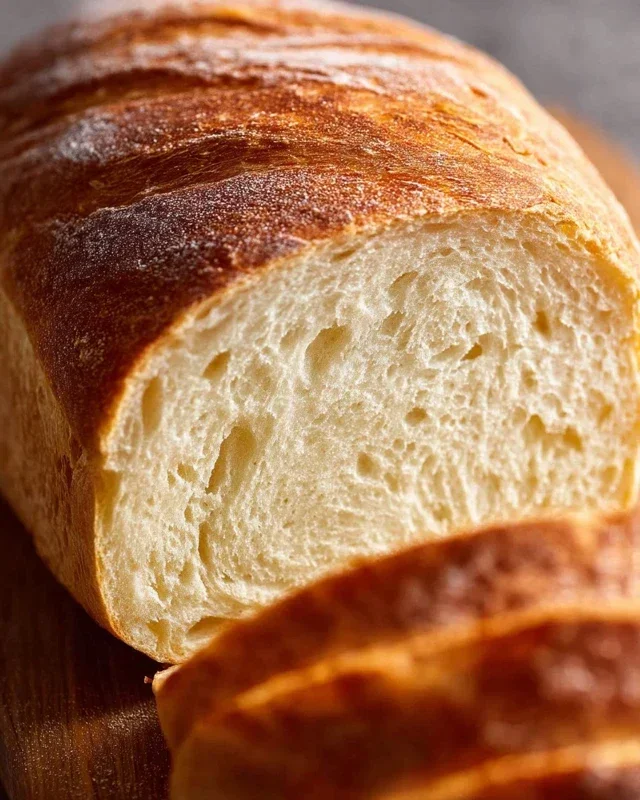
Preheat your oven to 375 degrees Fahrenheit (190 degrees Celsius). Once the dough has completed its second rise, it’s ready for the oven. You can optionally brush the top with a little milk or egg wash for a shinier, more golden crust. Carefully place the loaf pan in the preheated oven. Bake for 30-35 minutes, or until the crust is a deep golden brown and the internal temperature of the bread reaches about 190-200 degrees Fahrenheit (88-93 degrees Celsius) when tested with an instant-read thermometer. You can also tap the bottom of the loaf; it should sound hollow.
Cooling: The Final Test of Willpower
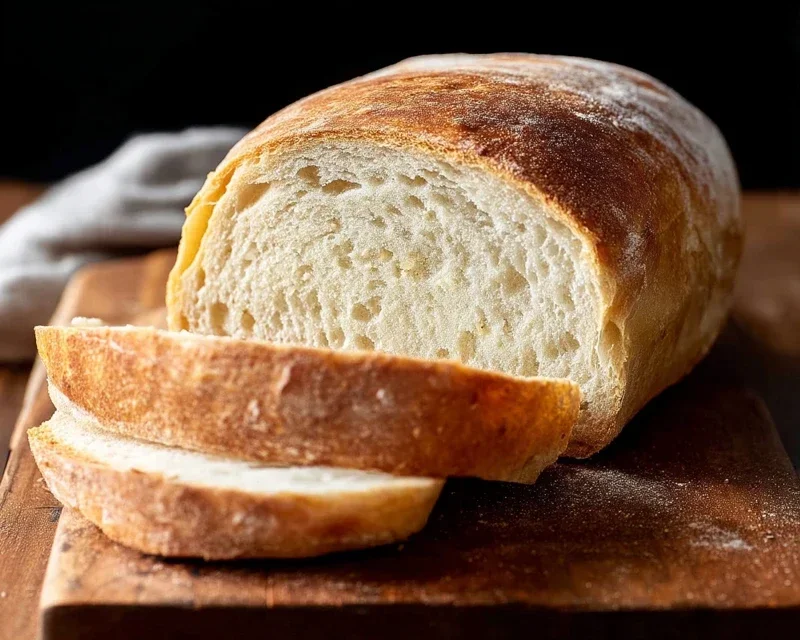
This is perhaps the hardest part! Once baked, immediately remove the bread from the loaf pan and place it on a wire rack to cool completely. This allows air to circulate around the loaf, preventing the bottom crust from becoming soggy. Resist the urge to slice into it while it’s still hot; the internal structure needs to set. Waiting for it to cool will result in a much better texture and flavor. Once cooled, slice it thick, slather it with butter, and savor the incredible taste of your own homemade bread. Enjoy every delicious bite!
Conclusion:
You’ve done it! By following these steps, you’ve unlocked the incredible satisfaction of baking your own homemade bread. This recipe is fantastic because it’s approachable for begin extractners, uses simple ingredients you likely already have, and results in a loaf that’s beautifully golden, incredibly fragrant, and delightfully chewy. The aroma alone is worth the effort, and the taste? Pure comfort. Imagin extracte slicing into a warm, crusty loaf, perhaps with a generous smear of butter or alongside your favorite soup. It truly elevates any meal.
Don’t be afraid to get creative! This basic recipe is a wonderful canvas for delicious variations. Consider adding herbs like rosemary or thyme to the dough, a handful of olives, or even some grated cheese for a savory twist. For a sweeter touch, a sprinkle of cinnamon sugar before baking can transform it into a delightful treat. The possibilities are endless, and the joy of sharing your homemade creation with loved ones is unparalleled. So, take that leap, preheat your oven, and experience the magic of baking your own bread. You’ll be amazed at what you can achieve!
Frequently Asked Questions:
Why isn’t my bread rising properly?
Several factors can affect rising. Ensure your yeast is fresh and active (test it in warm water with a pinch of sugar – it should bubble). Over-kneading can develop gluten too tightly, preventing expansion. Also, make sure your proofing environment is warm enough. A slightly warm oven (turned off) or a sunny spot can help. Avoid drafts!
How long will my homemade bread stay fresh?
Stored properly in an airtight bag or container at room temperature, your homemade bread will typically stay fresh for 2-3 days. For longer storage, freezing is an excellent option. Slice it before freezing for easy toasting directly from the freezer.
Can I make this recipe with different types of flour?
Absolutely! While this recipe is optimized for all-purpose flour, you can experiment with a percentage of whole wheat flour. Be aware that whole wheat flour absorbs more liquid, so you might need to adjust the water slightly. It will also result in a denser loaf. For more advanced bakers, consider sourdough variations!
Homemade Bread
A simple and delicious recipe for homemade bread, perfect for beginners. This recipe uses basic pantry staples for a perfectly baked loaf.
Ingredients
-
2 cups warm water (105-115 degrees)
-
1 Tablespoons active dry yeast
-
1/4 cup honey
-
2 teaspoons salt
-
2 Tablespoons canola oil
-
4 – 5 1/2 cups all-purpose flour
Instructions
-
Step 1
In a large bowl, combine warm water, active dry yeast, and honey. Let it sit for 5-10 minutes until foamy. -
Step 2
Stir in salt and canola oil. -
Step 3
Gradually add the flour, one cup at a time, mixing until a shaggy dough forms. Knead the dough on a lightly floured surface for 8-10 minutes until smooth and elastic. Add more flour as needed to prevent sticking. -
Step 4
Place the dough in a greased bowl, turning to coat. Cover with a damp cloth and let rise in a warm place for about 1 hour, or until doubled in size. -
Step 5
Punch down the dough and shape it into a loaf. Place in a greased loaf pan. -
Step 6
Cover and let rise again for 30 minutes. -
Step 7
Preheat oven to 375 degrees F (190 degrees C). Bake for 30 minutes, or until golden brown and the internal temperature reaches 200-210 degrees F (93-99 degrees C). -
Step 8
Remove from pan and let cool completely on a wire rack before slicing.
Important Information
Nutrition Facts (Per Serving)
It is important to consider this information as approximate and not to use it as definitive health advice.
Allergy Information
Please check ingredients for potential allergens and consult a health professional if in doubt.